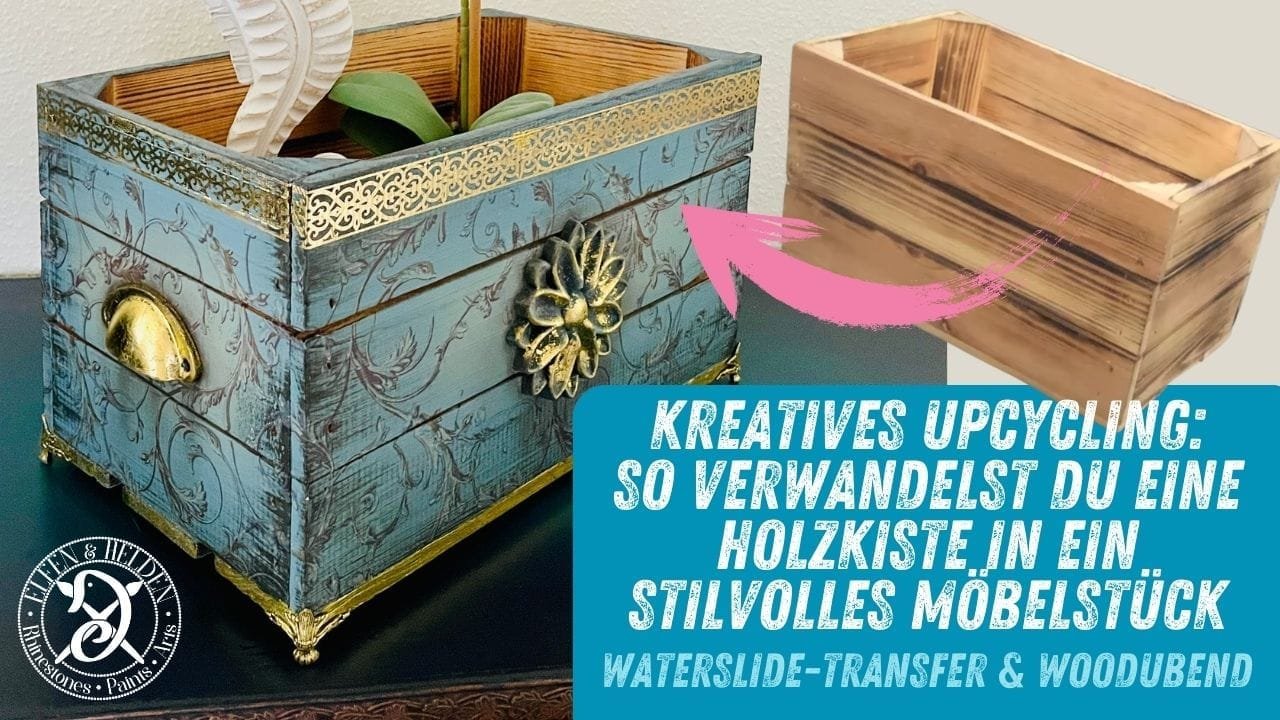
Welcome to a new tutorial with me, Angela from Elfen und Helden.
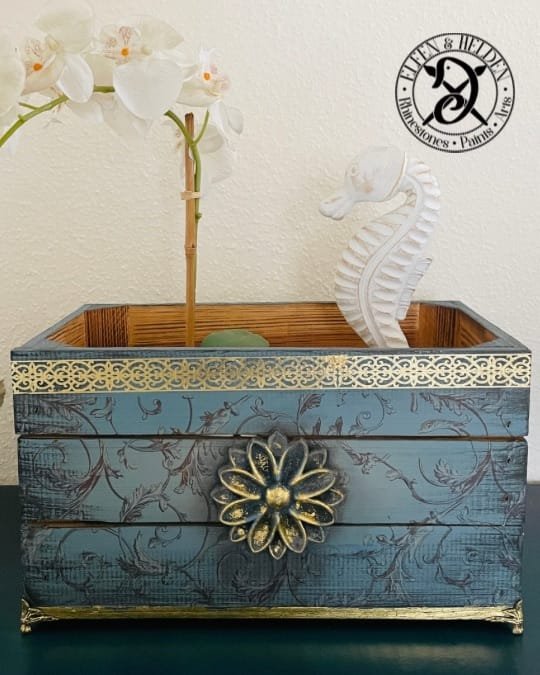
Our project today is a simple wooden box, which we completely change with the help of WoodUbend, Dixiebelle chalk mineral paints and a waterslide transfer from Belles & Whistles.

You can find the full description of this project below the video and a list of the products used at the end of this post.
To prepare, I first cleaned the box with White Lightning and since it is made of pine wood, I primed it with Bonding Boss Transparent to avoid changing the colors due to the tannins in the wood.
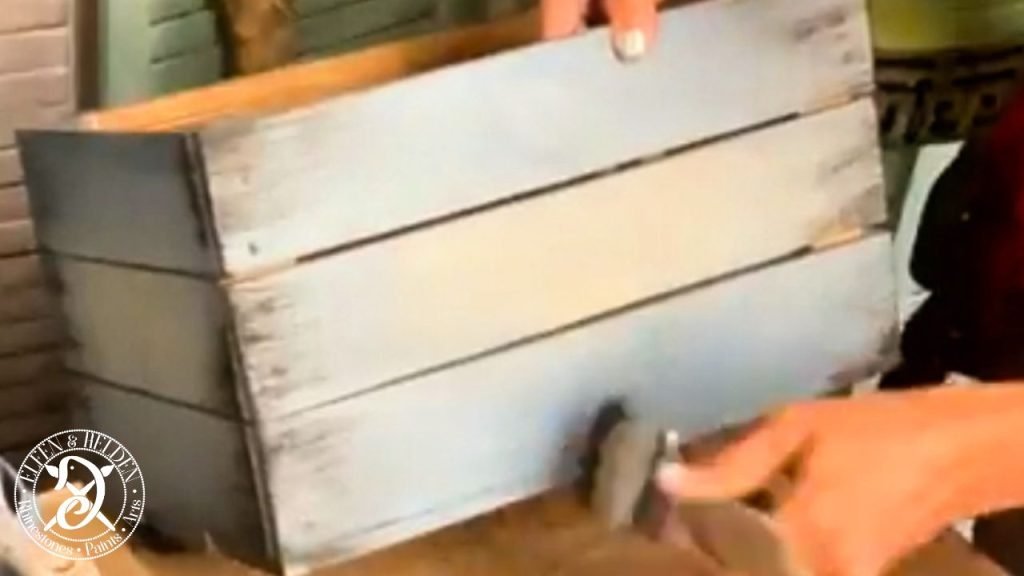
Today I’m working with 3 shades from the chalk mineral paint series: Dusty Blue, Burlap and for a bit of shabby Coffee Bean.
I first apply Dusty Blue to the sides in the outer area. The floor is painted entirely in this color. The brush used is the Mini Brush. A synthetic brush that picks up color perfectly and is ideal for blending colors.
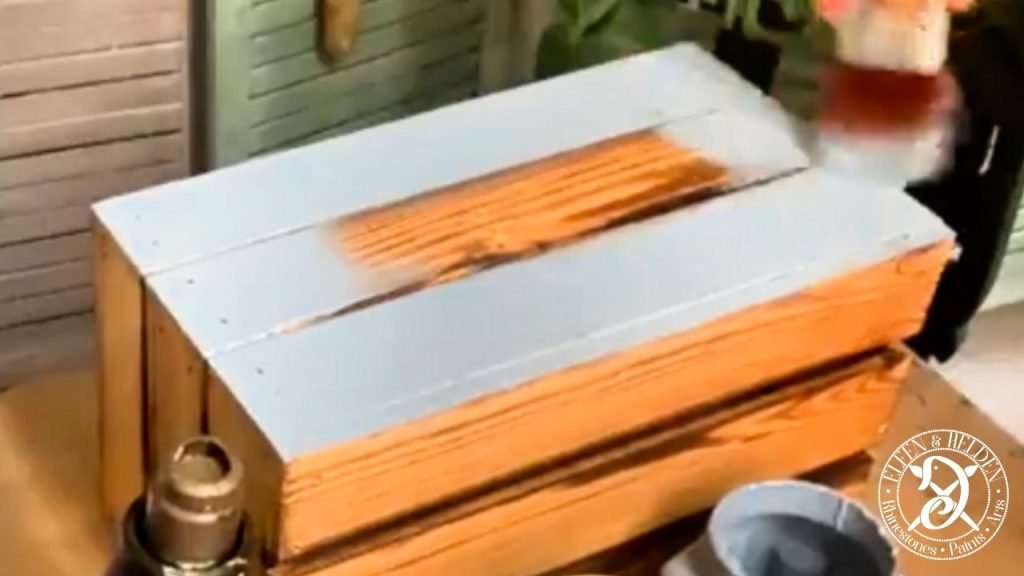
The burlap is now placed in the middle and is worked into each other with the Dusty Blue with light brush movements at the transitions while the paint is still wet to simulate fading of the paint. Since the colors dry quite quickly, I spray some water over it with my Fine Mist spray bottle so that it stays moist until I am satisfied with my result. There are many ways to blend colors together. The one shown here is just one of them.
After the transition between the colors is already blurred, I go over the entire surface in different directions with the burlap brush. I barely touch the surface. I call it butterfly kisses. I work back and forth until I’m happy with the color result.

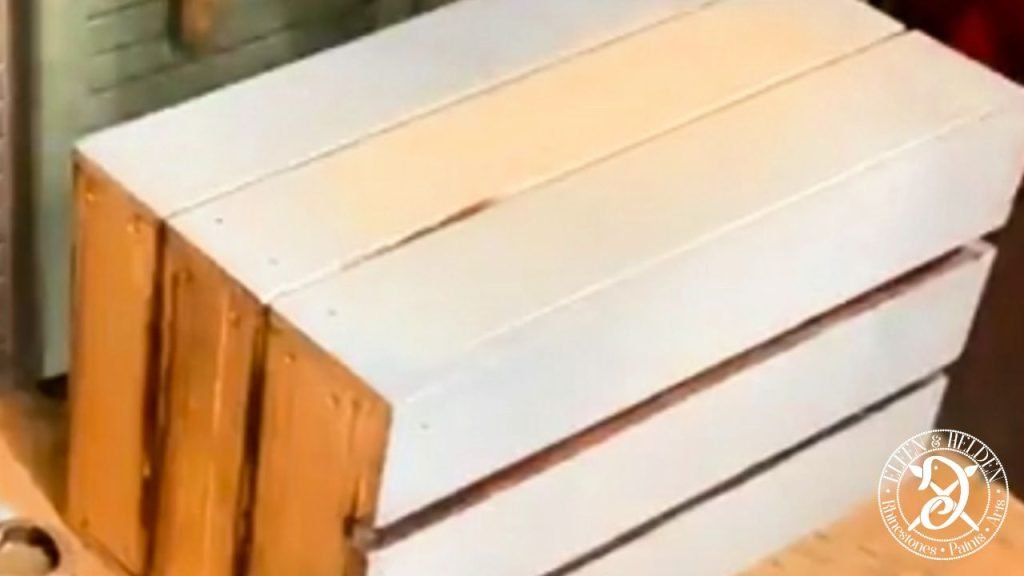
If a brush has absorbed too much of the other color, I simply clean it with a damp paper towel. To keep the paint moist, you can either mist the project or use your brush. I often work with both techniques, depending on my mood.
This is how I edit all 4 pages. Since the colors cover very well and this will be a decorative piece, I only need one coat of paint.
After the paint has dried, I emphasize the areas that would naturally age a little, i.e. the edges, using the drybrush technique with the dark coffee bean. I use the Premium Chip Brush for this because I would like to recognize a few brushstrokes now. With the dry-brush technique, I take up very little paint and even unload it onto a piece of cardboard so that the brush is almost dry. I work from the outside inwards with light brush strokes.
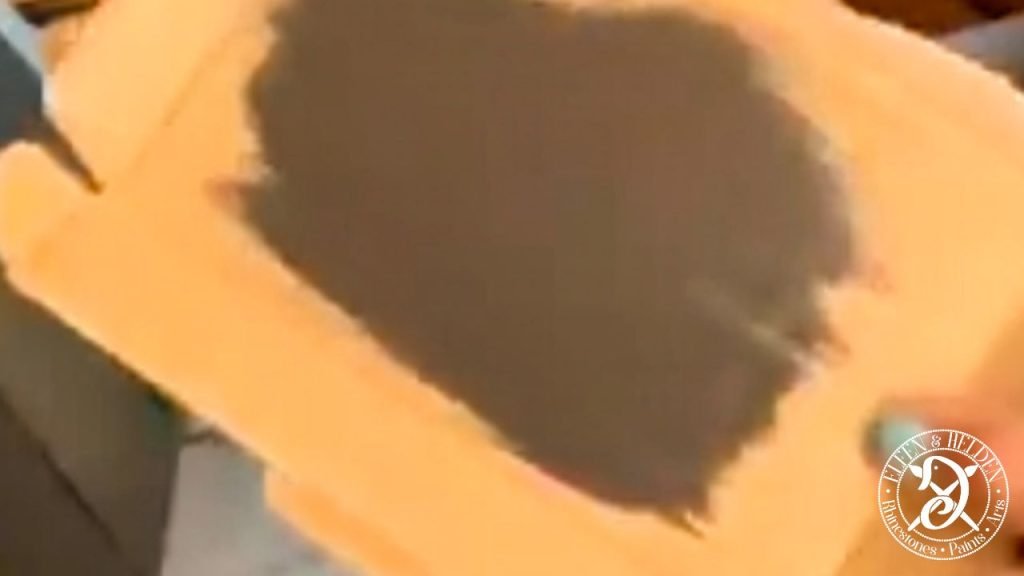
At one point I still had too much of the paint on the brush. As I didn’t like this, I applied the Dusty Blue from the inside out using the same technique to tone down the Coffee Bean.


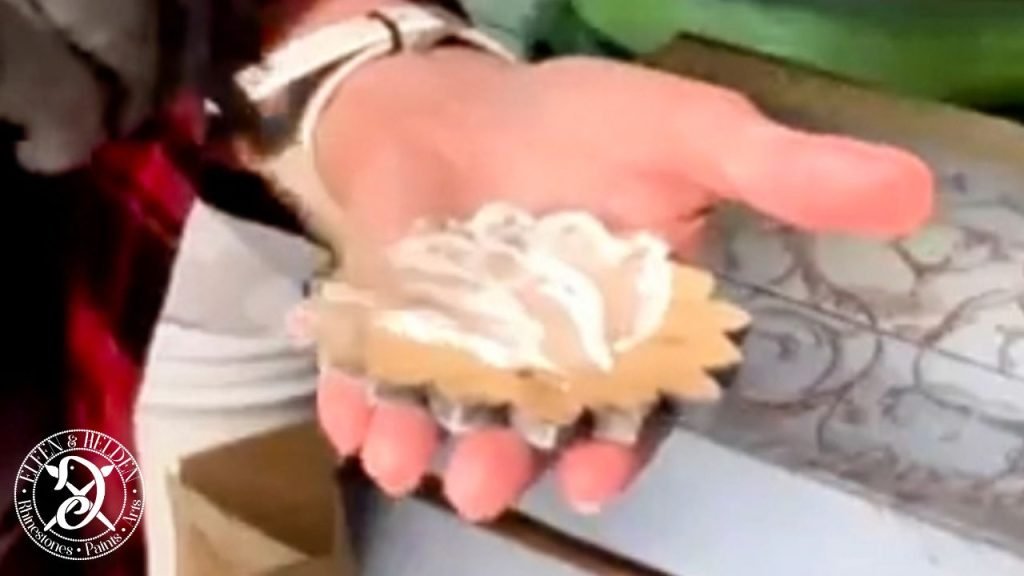
Now that I have the Coffee Bean open, I prepare my WoodUbend flowers WUB6098. These are given a base in coffee bean and can dry while I apply the water-slide transfer in the next step. To make it easier to get into the recesses of the ornament, I use the French tip brush for the coffee bean.

The waterslide transfers from Belles & Whistles have a colorful and a gray side of the motif. The colorful side is later placed on the project and the gray side is used as a reference.
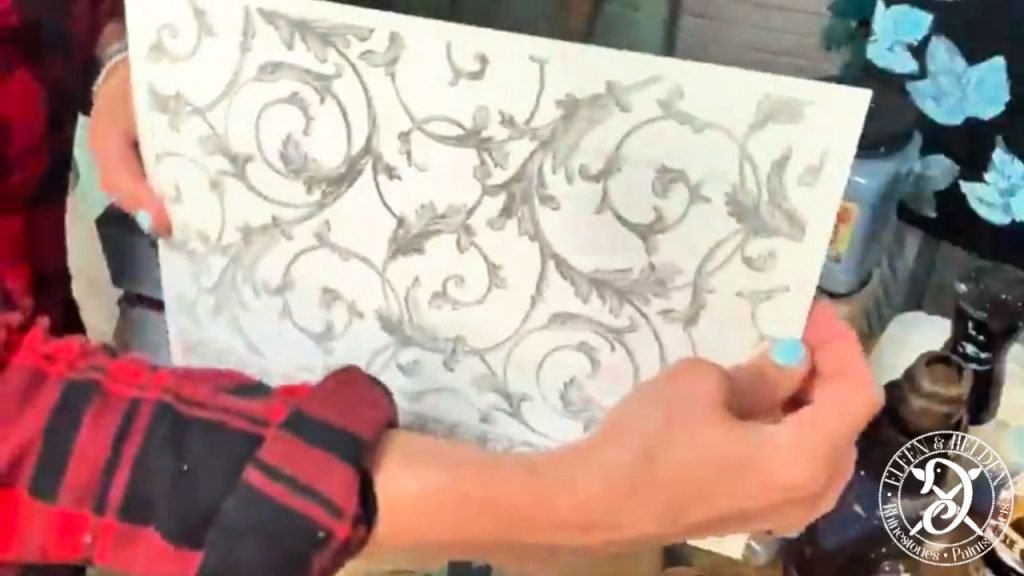

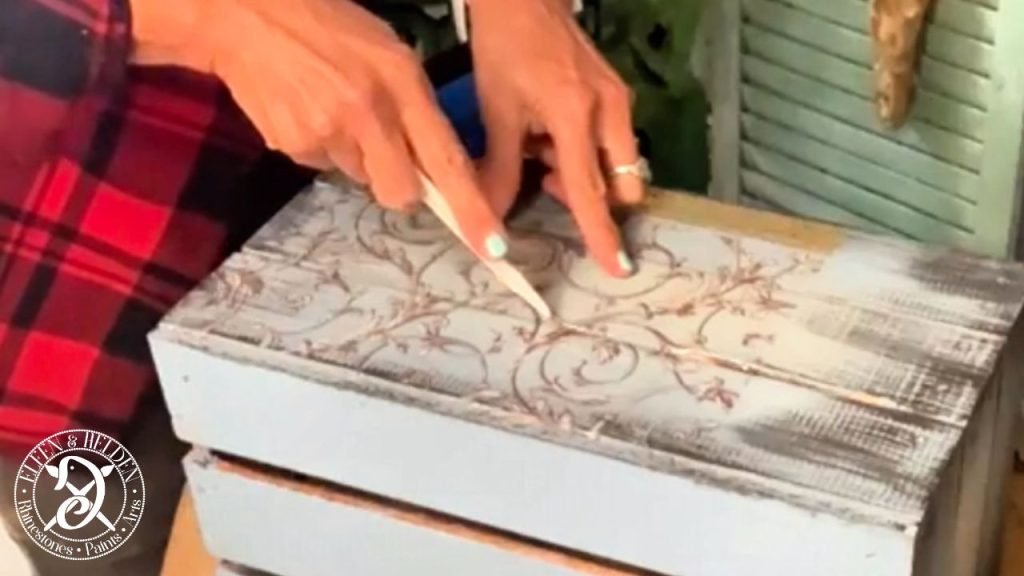
To be able to align the motif better, I cut the edge to size. Now I remove the clear protective film and place it with the colored side in the desired position, as I said. The waterslide transfers are now transferred with the help of a damp cloth, which I rub over the gray side of the paper to moisten it. Only then does it come loose and adhere to the project. The Waterslide transfers do not have a sticky back like the scratch-off transfers. You need a little patience, but definitely less muscle power to make these transfers. I use a squeegee to press on the transfer and remove excess water and carefully lift the corners to check whether the transfer is already coming off. If not, I’ll put the corner back on.
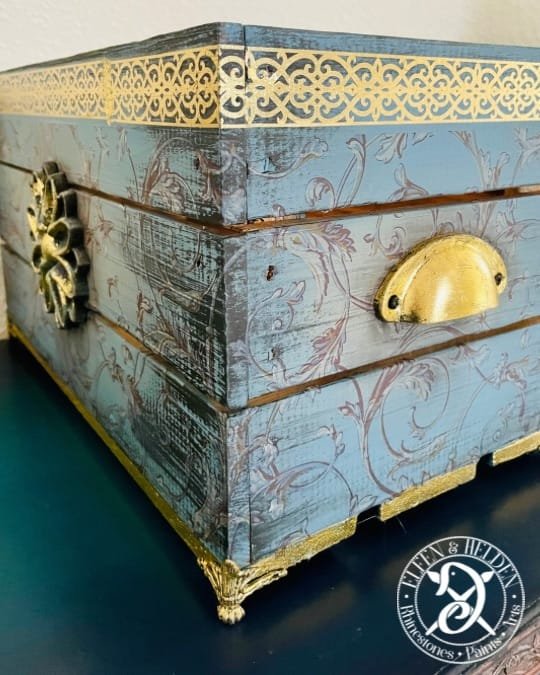
I cut the slits between the boards of the box with a scalpel and press it into the slot with the squeegee.


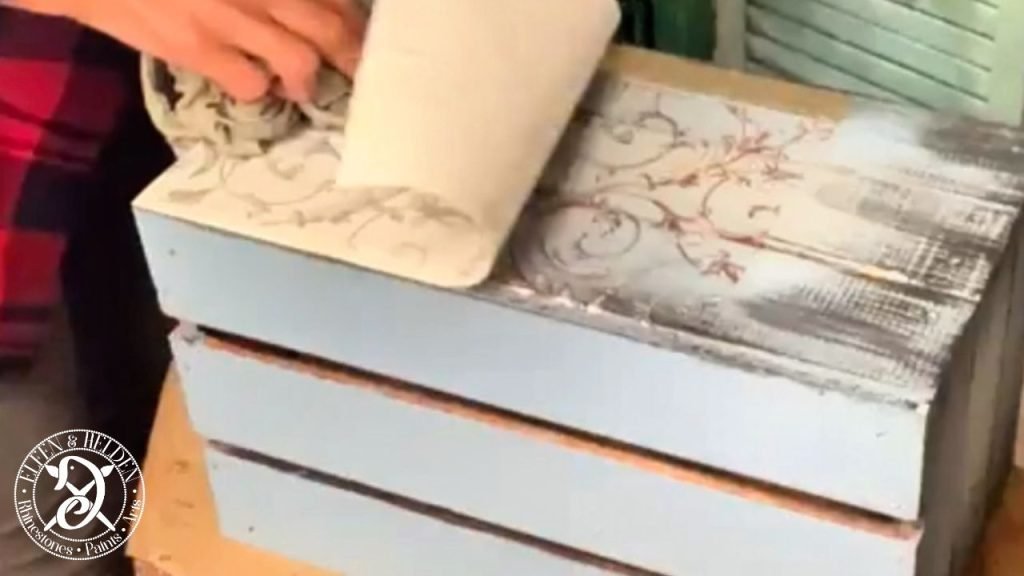
Now comes the next part. So that I can see the transition better, I also cut off the edge right up to the motif. To prevent the transfer from shifting, I’m already folding it around the corner.


The next steps are now the same as before. We do the whole thing around the entire crate. Oh yes, and don’t forget to remove the clear protective film. Anyone who was there live knows what I mean ? Yes, I make mistakes too!
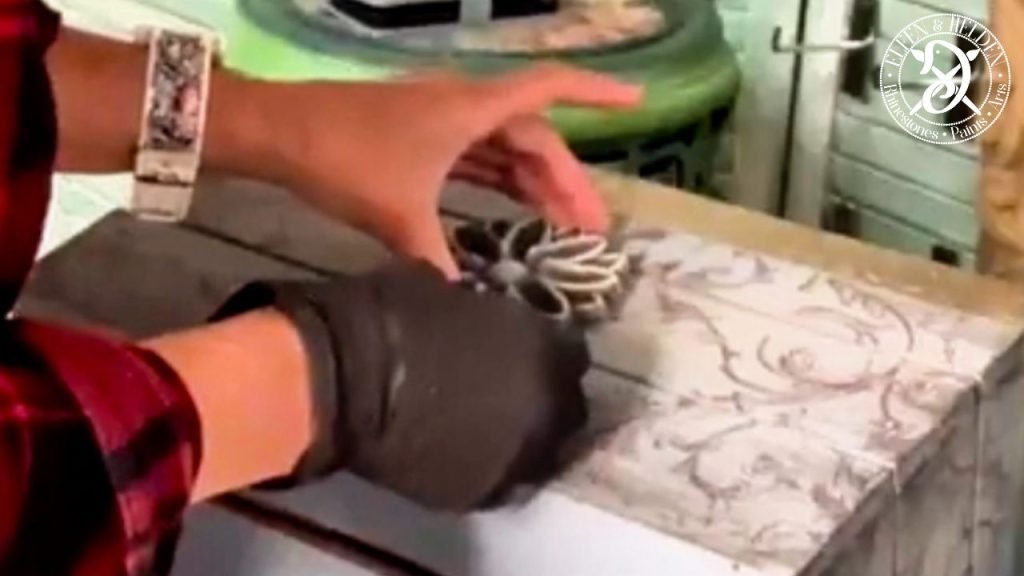
Now I’ll turn my attention to the WoodUbends. The Coffee Bean is now dry and the ornament will now be drybrushed with Dusty Blue only over the raised areas of the ornament. WoodUbends can be painted before or after installation. As I don’t want to change my base any more, it is first prepared and then applied with wood glue. I use WoodUglue from WoodUbend. To make it easier for the ornament to cling to the surface, I preheated it a little on my heating plate to make it flexible. Apply the wood glue over the entire surface of the back, place in the desired position and press firmly. I heat it up again and press it down again, especially at the edges, so that it clings completely to the surface. I remove the excess glue that oozes out with a damp brush. A damp cloth or moist ear swab will also work.


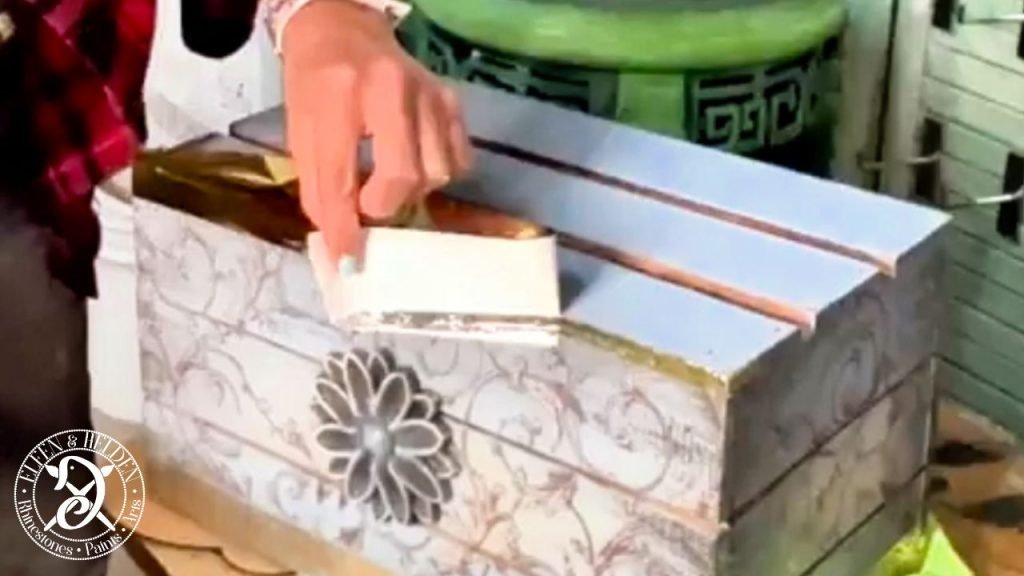
I would like to match the bottom edge, the ornaments, handles and feet to the gold in the transfer. To do this, I first apply some of the Belles & Whistles Stick with Me glue with a brush over the areas I want to gild. I leave the glue to dry for at least 20 minutes. When the glue has dried clear and is sticky to the touch, you can continue. I lay the Dixie Shine foil, which I have already cut to size, on top. I rub the foil into the indentations with the Dixiebelle Finishing Pad. The gold now sticks to the adhesive when you peel it off. You can also apply the gold foil to any areas that are still sticky afterwards. I use the strip all around until all the gold has been used up. I do the same with the ornaments, which I only partially treated with glue, the handles and later the feet.
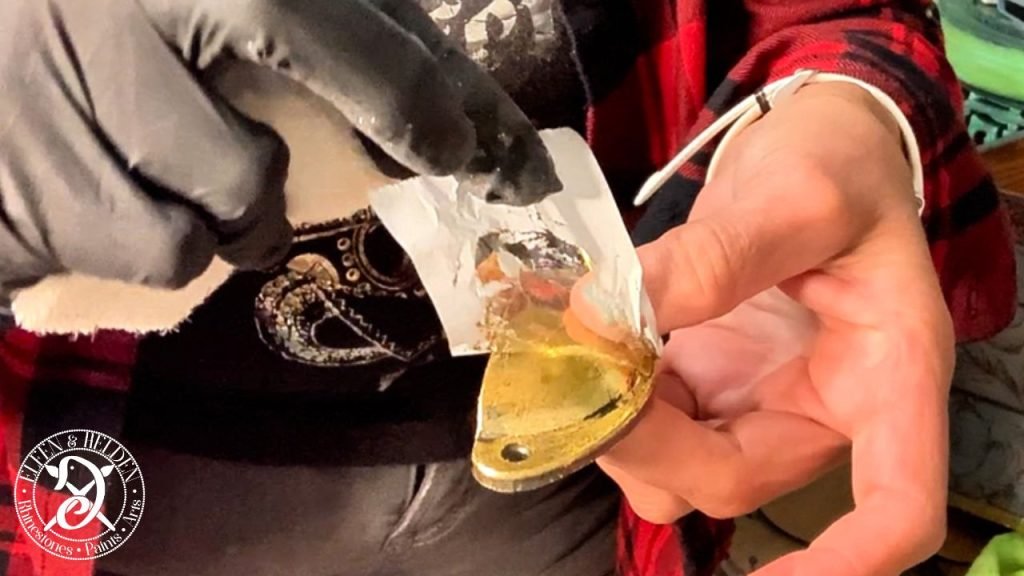
Incidentally, the handles and feet are made of metal. I simply cleaned and degreased it with alcohol beforehand.


As a last step, the feet and the shell handles are screwed on and the transfer is sealed with the matt top coat from Dixiebelle.


And yet another project has been completed. How do you like it ? You can find more pictures at the end of the article ?

Do you have any questions or suggestions? Then feel free to write me in the comments or write me a message.
For today I say thank you again for reading and goodbye until the next blog post
Your Master of Disaster
Angela
Products used:
Dixiebelle Bonding Boss Clear/Transparent
Dixiebelle Chalk Mineral Paint
Belles & Whistles Waterslide Transfer Baroque Swirls
Belles & Whistles Stick with Me Glue/Kleber
Belles & Whistles Dixie Shine Gold
WoodUbend Ornament/Flower/Flower WUB6098
Dixiebelle Fine Mist Bottle / Spray Bottle
Elves & Heroes Squeegee/Squeegee
Not all of my favorite products I carry myself in the shop. Nevertheless, I don’t want to withhold them from you and I’m happy about every cent in my coffee box so that I can continue to compile informative articles for you.
The links marked with an asterisk (*) are so-called affiliate links. If you click on such an affiliate link and buy via this link, I get a commission from the online shop or provider in question. But your price does not change!
Festool ROTEX RO 90 DX FEQ-Plus geared random orbital sander
Festool 497481 Interface Pad IP-STF-D90/6
Festool CTL SYS Mobile Dust Extractor – 575279
Hot air gun Steinel HL 1920 E*


Sign up for my newsletter and stay up to date.
I share new products, creative trends, helpful tutorials and exclusive offers with you.
You can easily unsubscribe at any time – via the link in the footer of every email or by sending me a message. You can find the relevant contact details in the imprint or directly in the newsletter.