
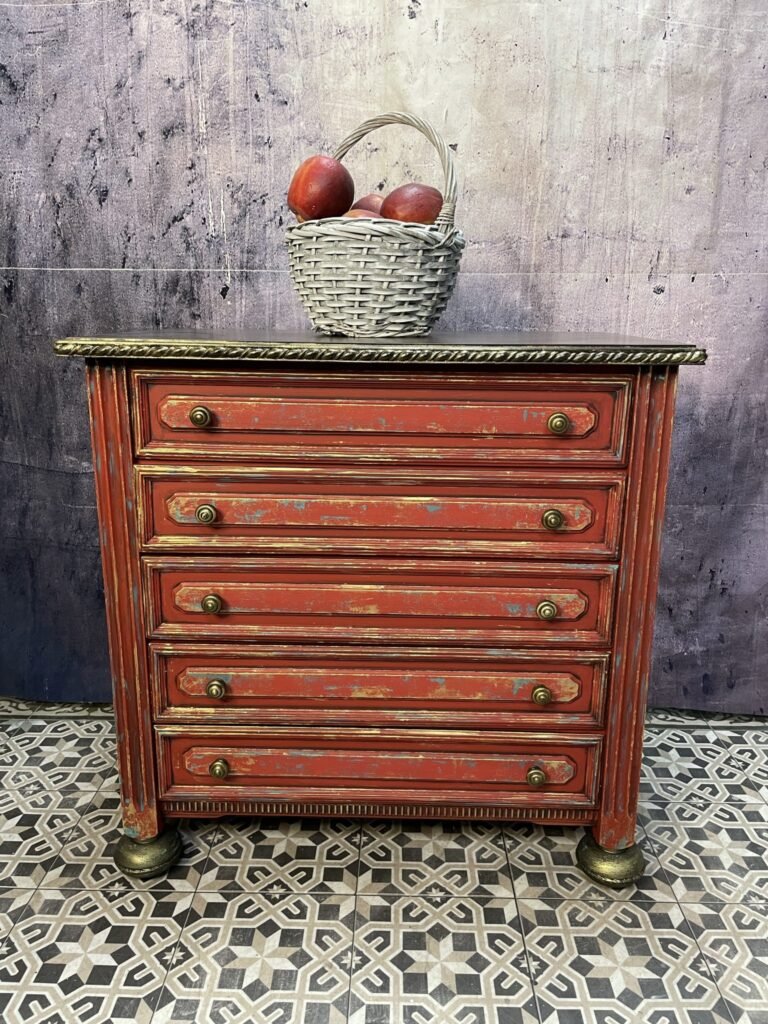
Today I have a chest of drawers model “oak brutal” in a super good condition and great solid wood. I have in mind a Moroccan style with lots of red, black, turquoise and of course gold.
The full description can be found below the video and a list of the products used at the end of this article.
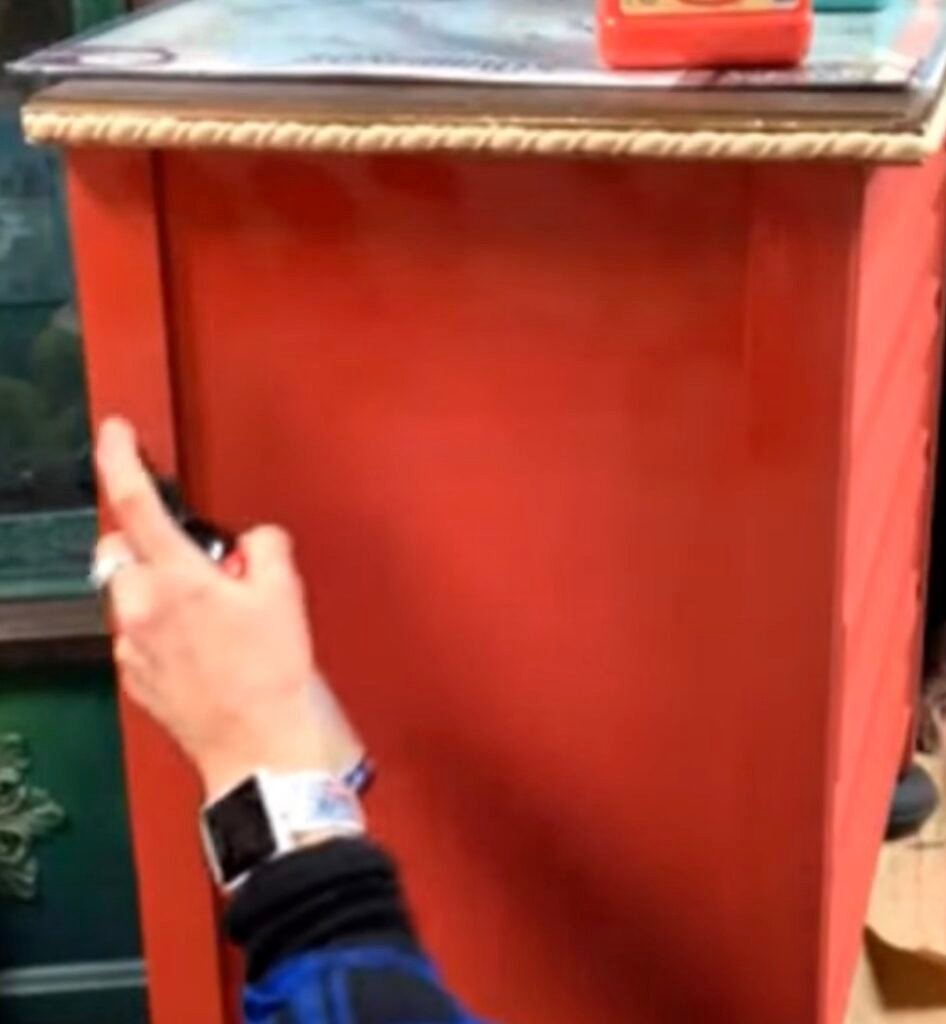
Of course, the good piece was first thoroughly cleaned with White Lightning. Then lightly smear the surface with an sanding sponge, as it was quite shiny.
As a basis for this, I choose the Barn Red and Honkytonk Red from Dixie Belle from the Chalk Mineral Paint series. First, I paint a base with the Barn Red. For this I use my Minibrush from Dixiebelle. The color covers excellently.

From the middle, I want to achieve a slight gradient from honkytonk to barn red.
It is important that the paint stays moist – for this I use my spray bottle, little paint and delicate brushstrokes to work the shades into each other. I hardly touch the surface with the brush, like butterfly kisses. The two shades are close to each other, so it’s very easy.

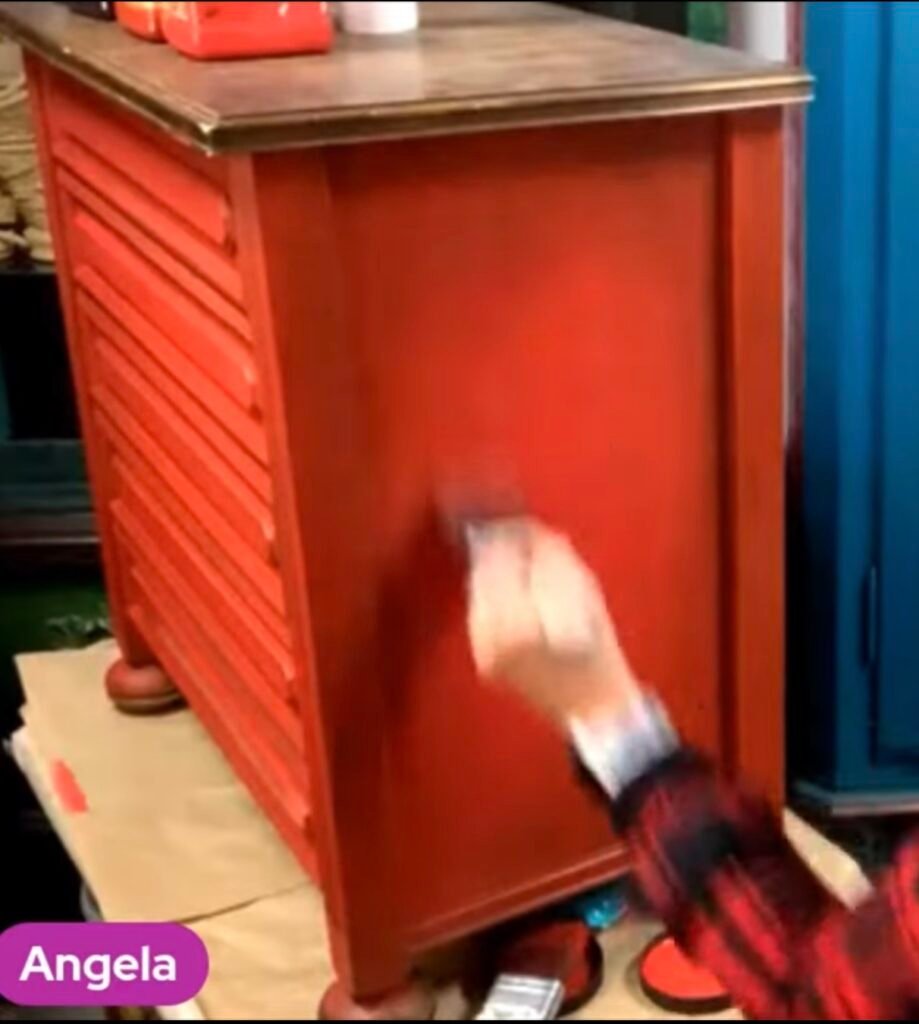

There are various methods to achieve color gradients. Today I chose this shape with a complete base color and then incorporate the accent color over it.
Dixiebelle’s Chalkmineral Paints have no volatile ingredients, are odorless, are super easy to work with and dry very quickly.
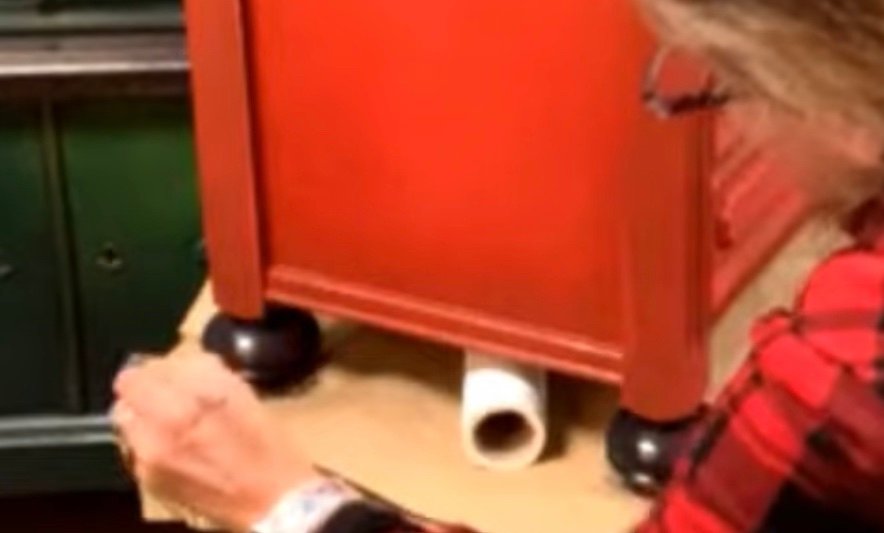
For the feet, I chose caviar, a rich black.
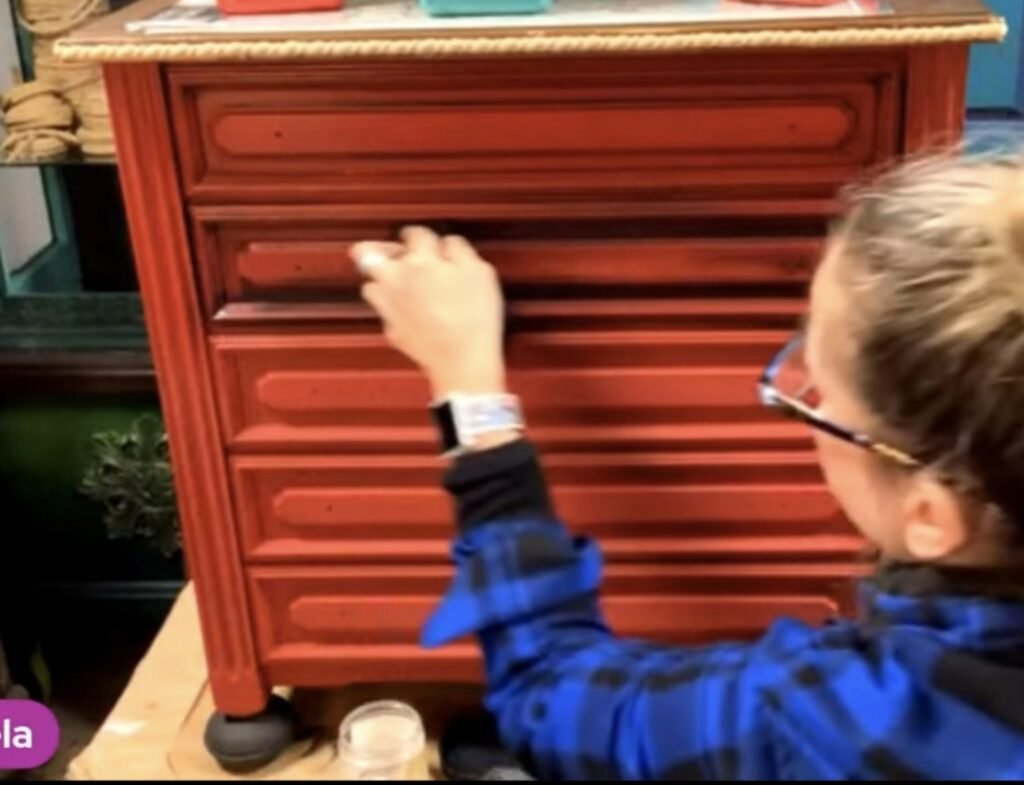
Of course, you can’t forget the sides and the edges and so on behind the drawers. That’s why I take out the drawers and paint these parts.

I like to paint my first layer with the drawers inside, so that I have a complete picture in front of me and then decide if it corresponds to my desired picture.
The feet have a groove and so I spontaneously integrated a WoodUbend trim and fill it. I used the Trim TR37.

The WoodUbend trims behave like wood when cold, when heated they become flexible like rubber. Then you can cut them to size and bend them into almost any shape. For the attachment I use the wood glue Quick & Thick from Titebond.
Even though the first coat of paint was well opaque, I now paint a second coat using the same technique. Since the overall picture was right for me, this time I paint the drawers separately and not in the chest of drawers.
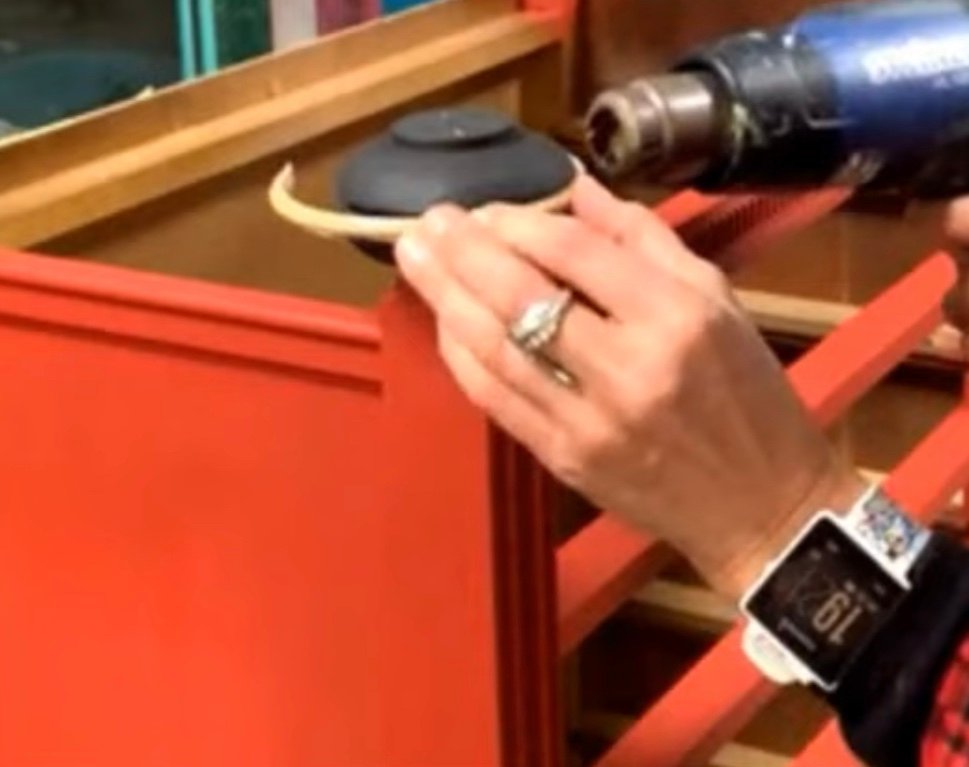
The tray also has a groove into which I work the WoodUbend Trim TR46 . This rounds off the overall picture wonderfully.

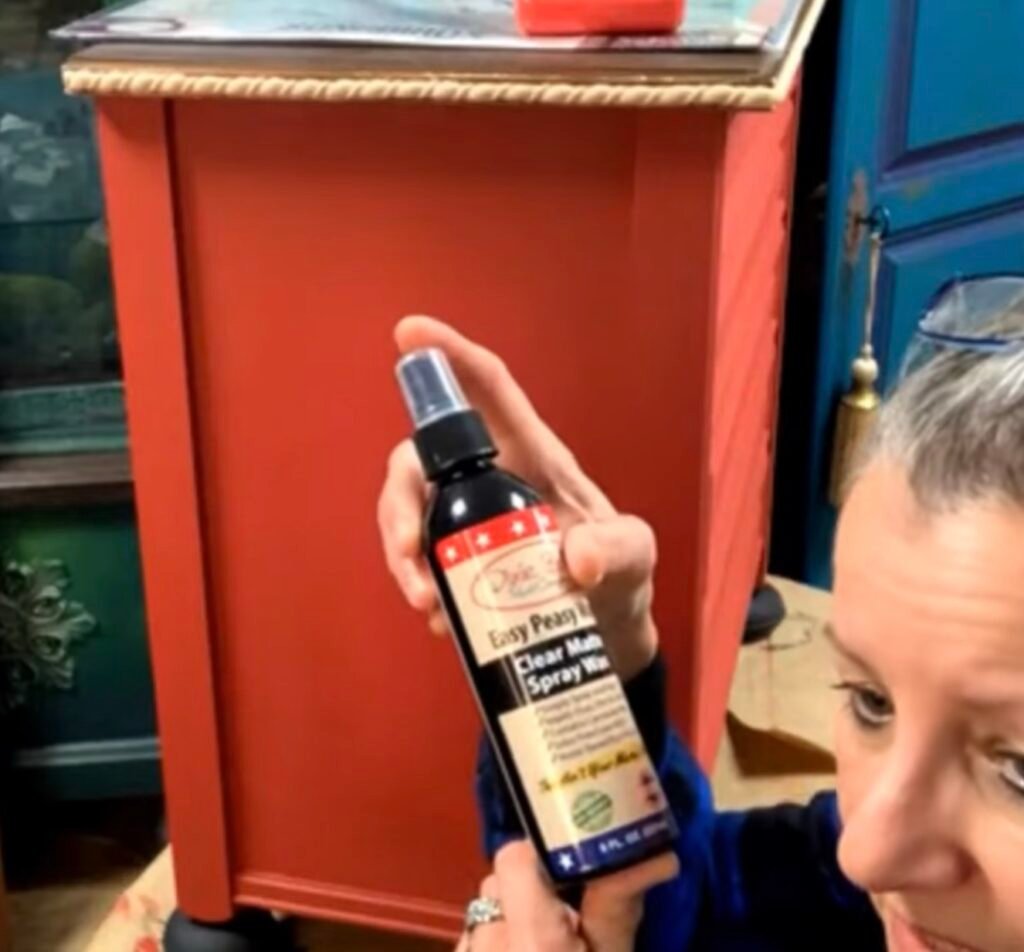
Now it’s time for the details. To do this, I first seal with Easy Peasy Spray wax. This is a liquid water-based wax for sealing and has the advantage that it dries within 25-30 minutes. This makes it easier for me to control the following layers if I’m not satisfied.
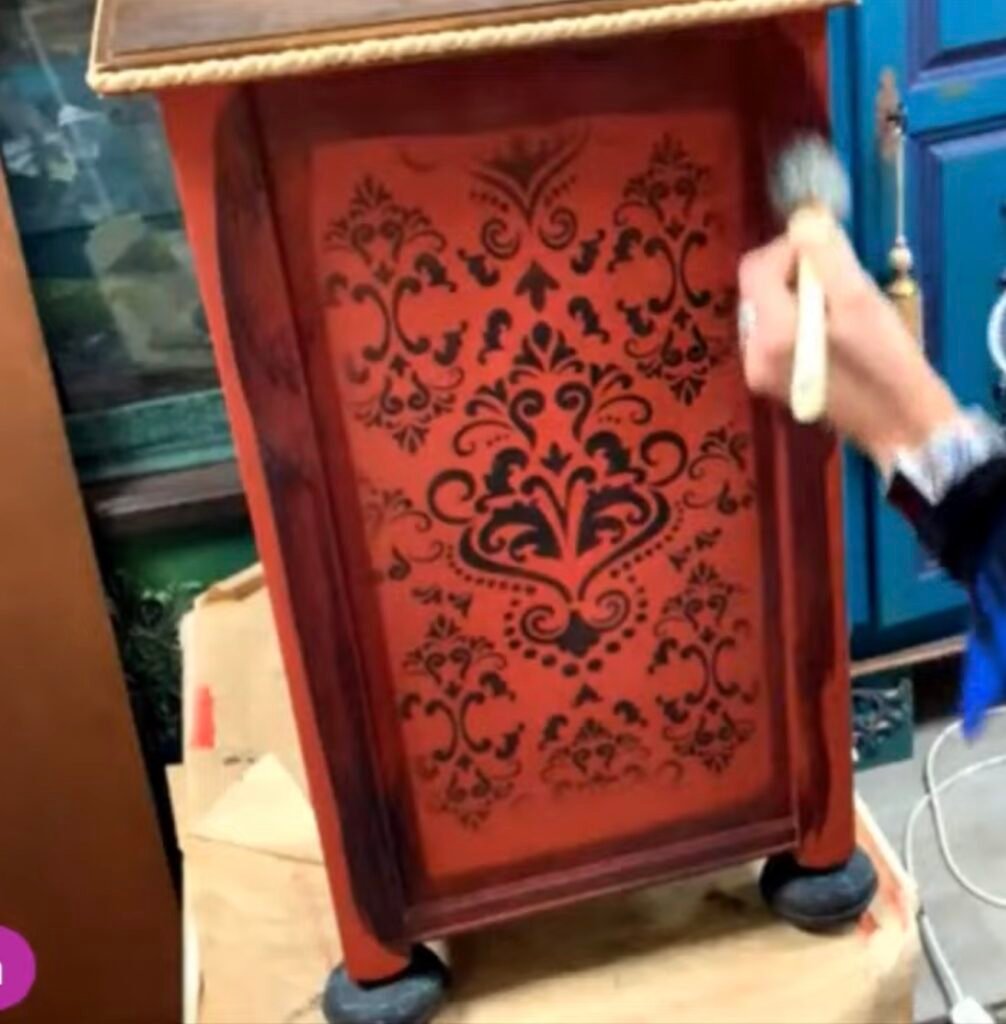
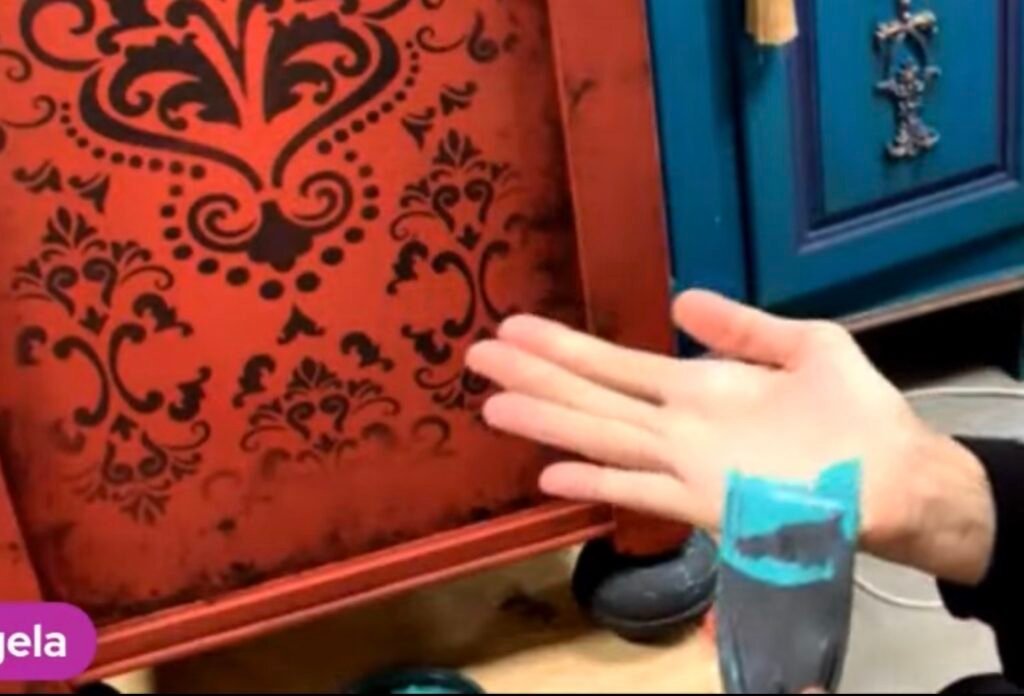
First, the Victorian Damask stencil from Belles & Whistles is used together with the caviar. The Best Dang Brush is great for larger stencils, especially for lazy people like me.
In the middle I stipple first, because there is even more color in the brush. After most of the paint has been dumped, I work outwards in circular motions to create a fading effect.


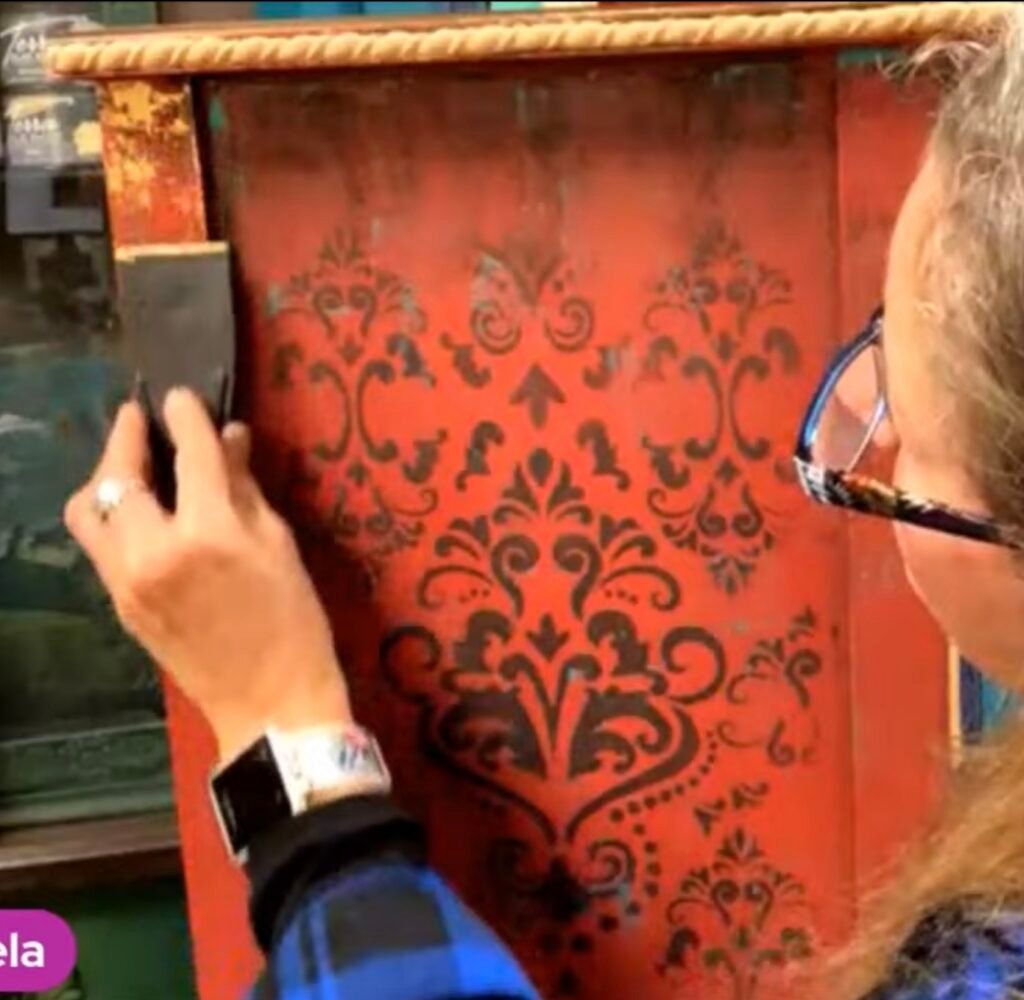
In the next step, I make myself a so-called wash. To do this, I take the caviar and dilute it with water. I spread the mixture through the corners and recesses of the drawers and wipe it back with a damp, lint-free cloth until I have achieved the desired effect.

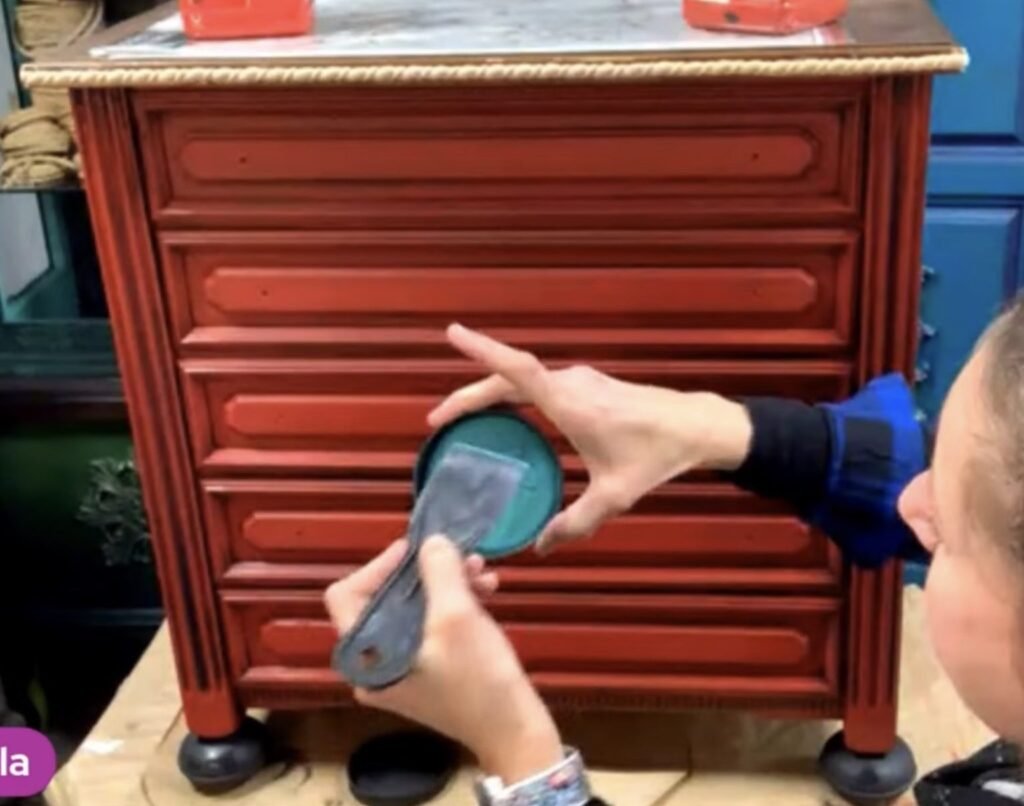
For the chippy effect, I now take a plastic spatula, the mud spatula and a painting spatula. First of all, I work the template more into the project. From the caviar I pick up a little at the tip and pull the spatula from the edges at a shallow angle towards the stencil. I moistened the edges a bit with water to make the paint easier to pull.
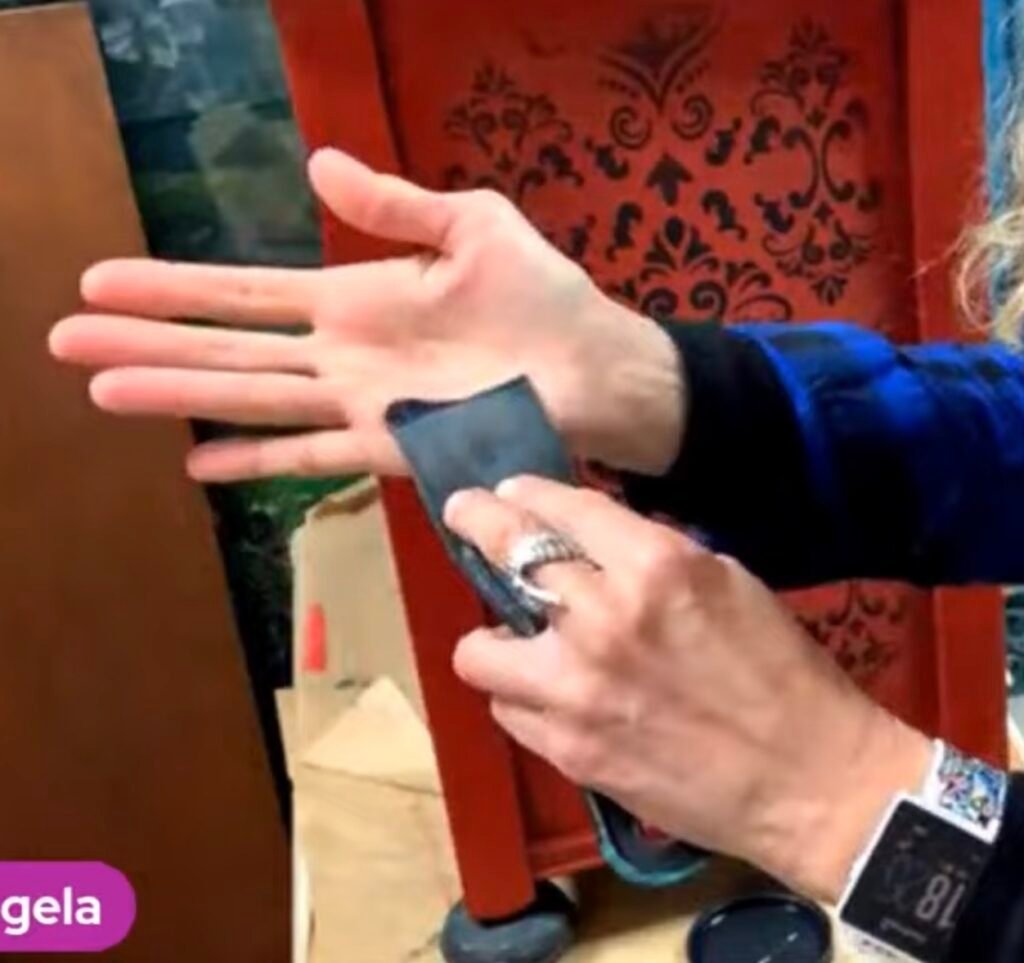
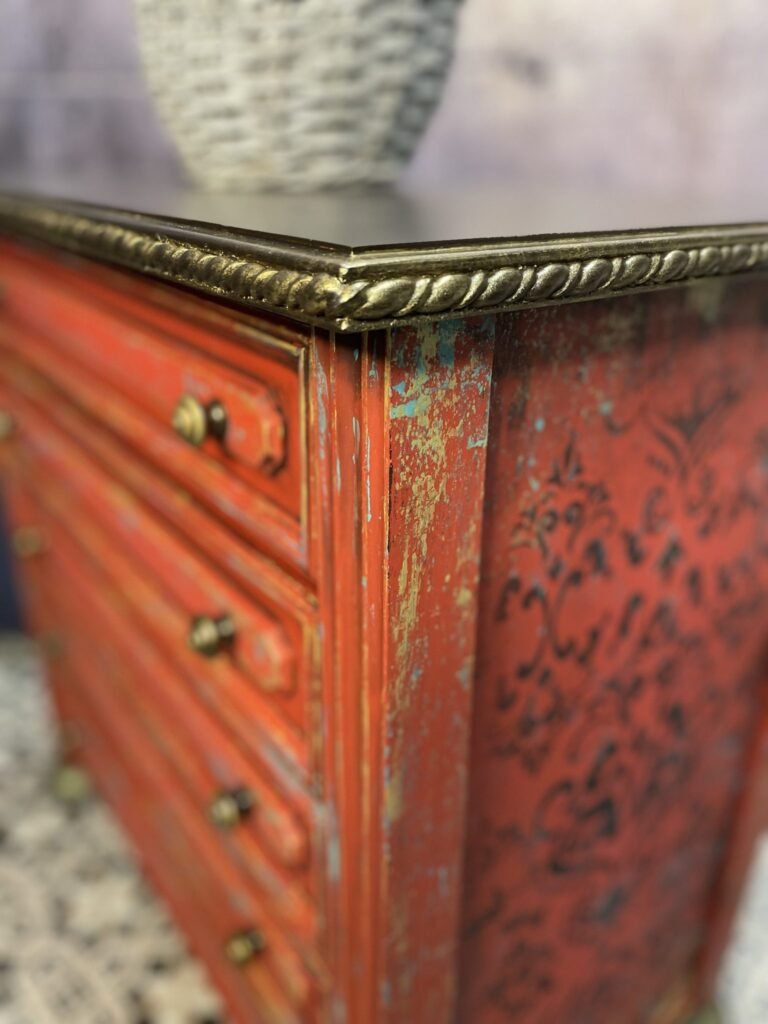
I repeat the same game with a turquoise, the Mermaid Tail from Dixiebelle and of course Gold, the Gold Digger from Moonshine Metallics. Always at the edges and edges. Wherever natural wear and tear would take place. Also about the stenciled part. This is only slightly elevated, but if I take the spatula completely flat, a little of the mermaid tail gets stuck on the elevations.


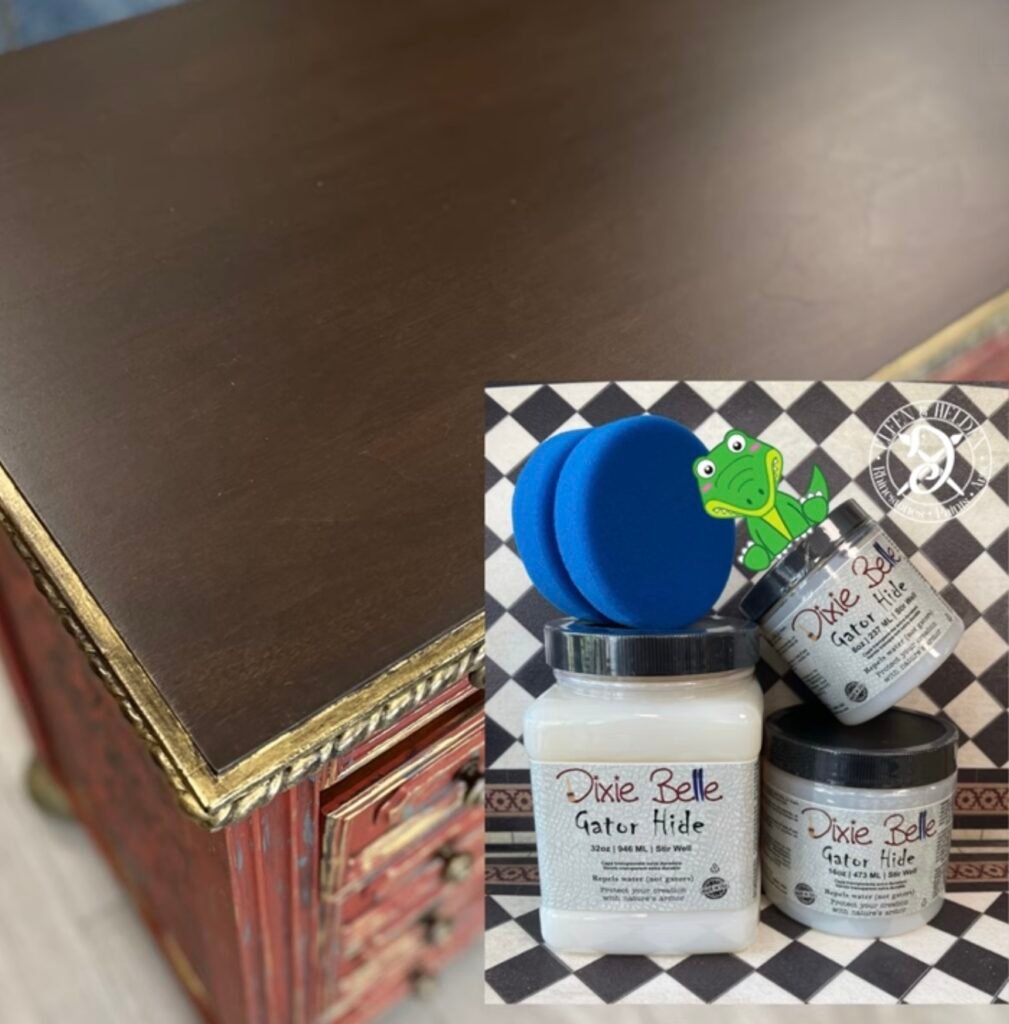
In the end, I worked on the surface of the chest of drawers with the No Pain Gel Stain in espresso. An oil-based gelicle that I let dry for at least 5 days and then seal with a water-based sealing varnish. For stressed surfaces, I prefer to use the Gator Hide from Dixiebelle.
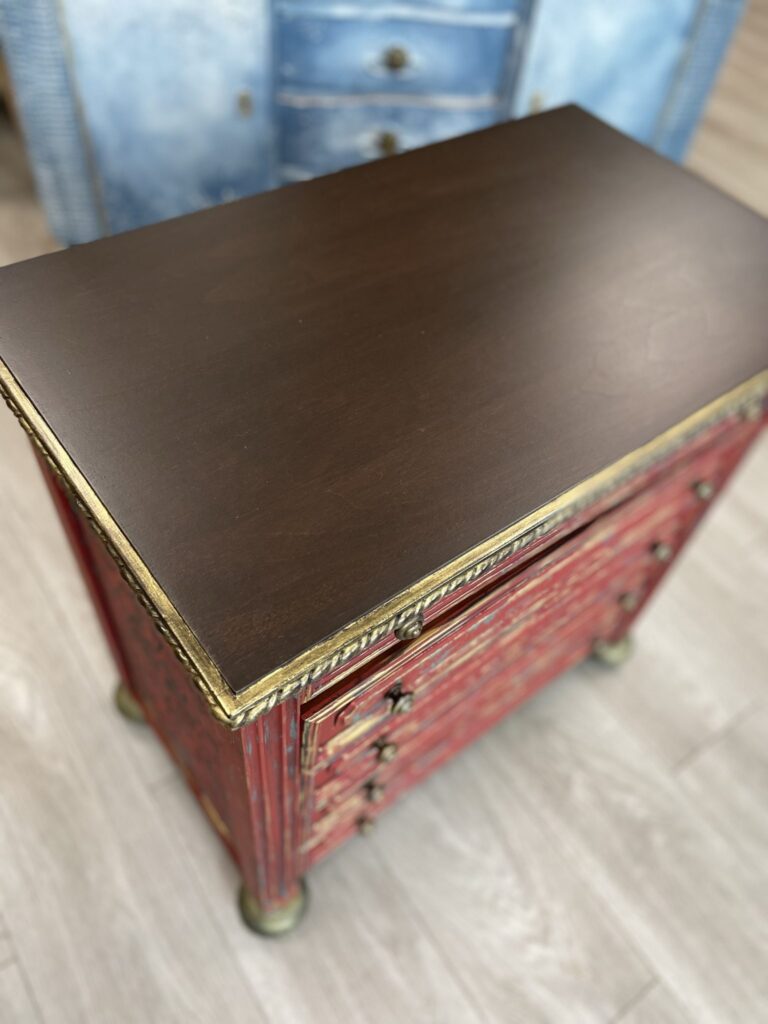
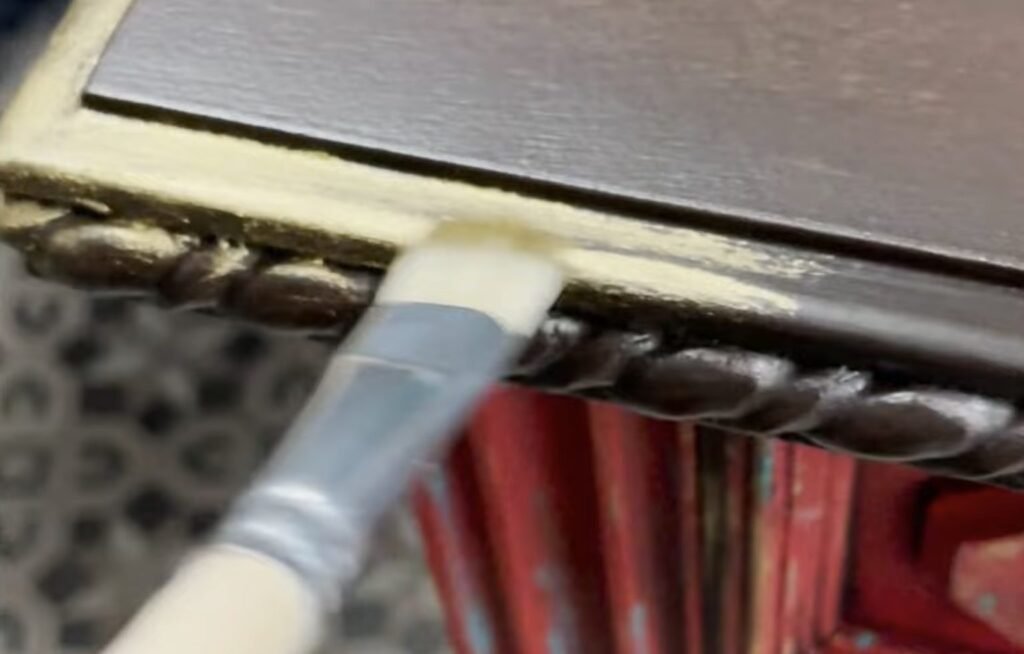
Finally, I use the Gilding Wax from Dixiebelle in gold for the final accents around the cover plate and the trim.
At the bottom you will find the pictures of the finished project. I hope you like it and you want to try it yourself.
Do you have any questions or suggestions? Then feel free to write me in the comments or write me a message.
For today I say thank you for reading and bye bye until the next blog post ?
Your Master of Disaster
Angela
Products used:
Not all of my favorite products I carry myself in the shop. Nevertheless, I don’t want to withhold them from you and I’m happy about every cent in my coffee box so that I can continue to compile informative articles for you.
The links marked with an asterisk (*) are so-called affiliate links. If you click on such an affiliate link and buy via this link, I get a commission from the online shop or provider in question. But your price does not change!
Festool ROTEX RO 90 DX FEQ-Plus geared random orbital sander
Festool 497481 Interface Pad IP-STF-D90/6
Festool CTL SYS mobile dust extractor – 575279
Hot air gun Steinel HL 1920 E*


Sign up for my newsletter and stay up to date.
I share new products, creative trends, helpful tutorials and exclusive offers with you.
You can easily unsubscribe at any time – via the link in the footer of every email or by sending me a message. You can find the relevant contact details in the imprint or directly in the newsletter.