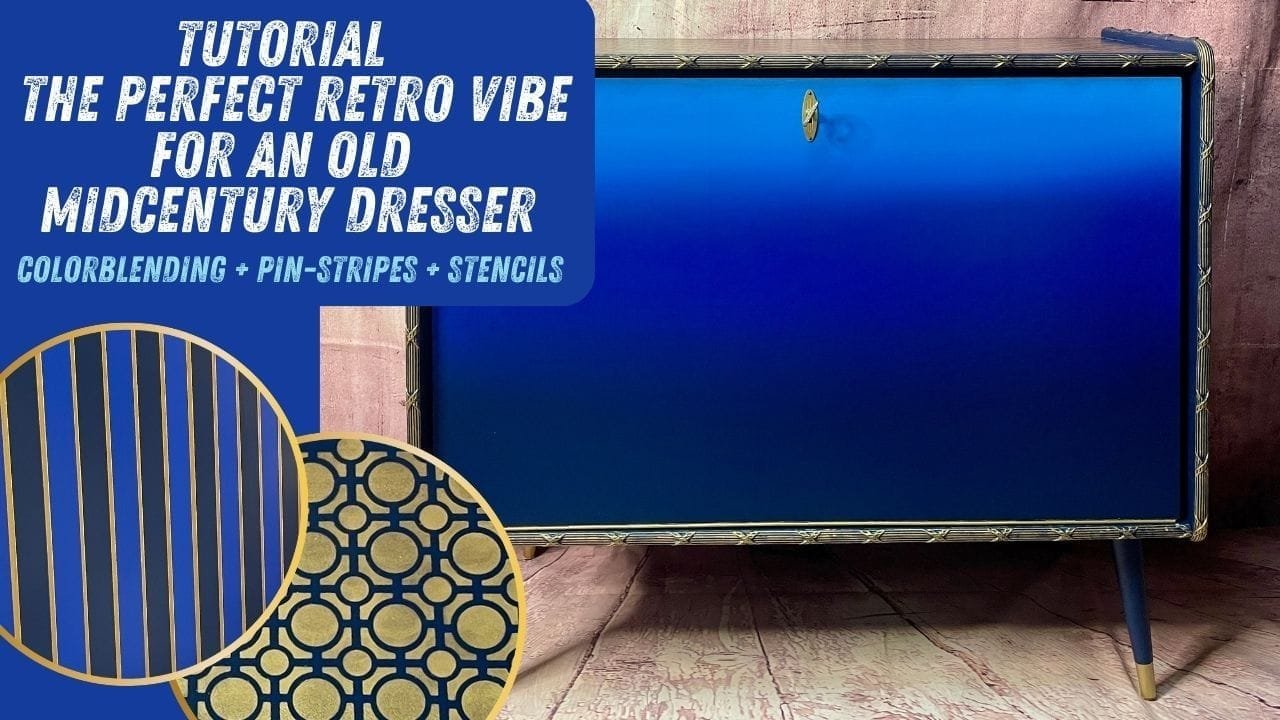
Perfect retro look for an old midcentury chest of drawers
Today we are transported to the middle of the last century. That’s where this small chest of drawers in the so-called Midcentury style comes from.
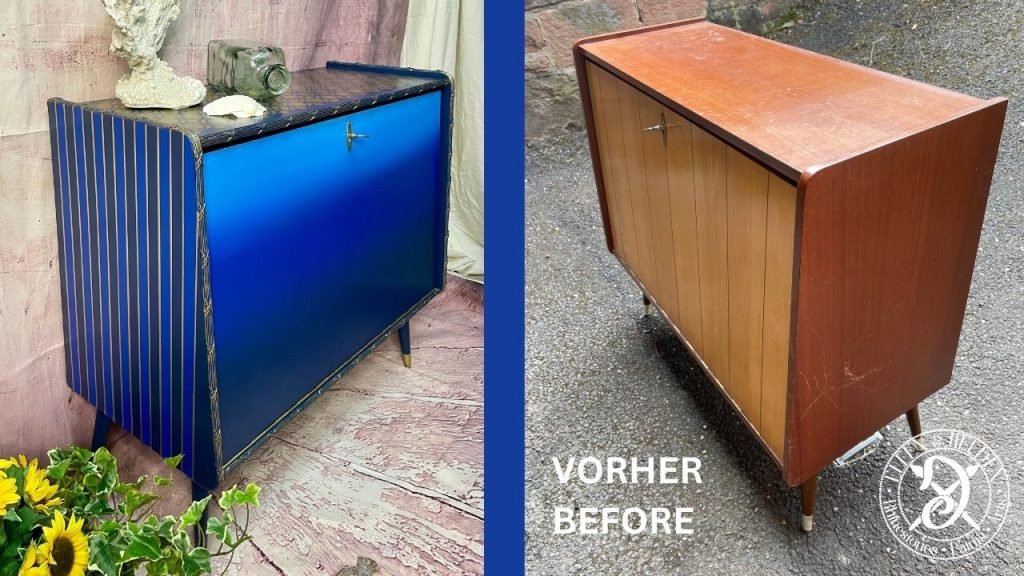
The customer found them gathering dust in the cellar of the house she had bought and would like to save them. Rescue is actually also meant in this way. It (i.e. the chest of drawers) was mass-produced and little wood was used, but all the more pressboard.
During its time in the basement, it absorbed moisture, took on a musty smell and the connections became unstable as a result.
You can find the full description of how to proceed below the video and a list of the products used at the end of this post.
As always, I clean the chest of drawers first with White Lightning from Dixiebelle. Cleaning is an important procedure for me. Not only because I like to create a clean base for my work, but also because I inspect every single centimeter and discover all the flaws and problem areas. First white lightning, scrub, wipe with clear water and dry with a lint-free cloth.


Here I decided to take the good piece apart. The hinge strip was loose and the screws could no longer be tightened because the material was crumbling.
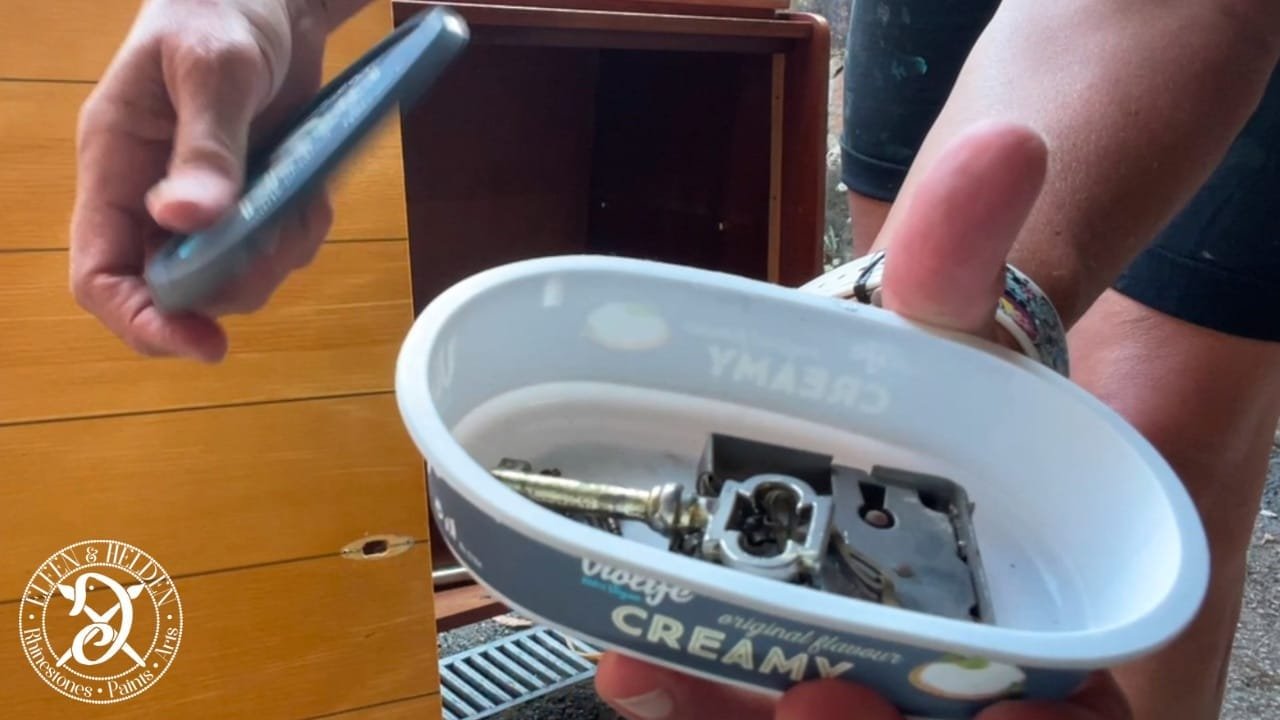
A little tip: I secure all parts, screws, keys, etc. in a small box. Put the lid on and nothing gets lost.
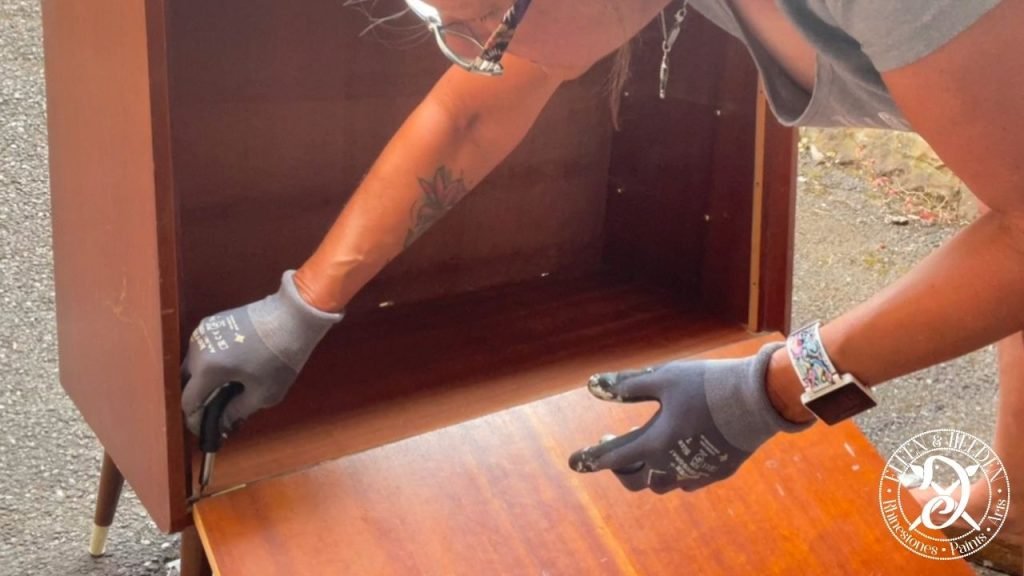
I also removed the back wall at the end, because the clamps had broken off in part.
Then the actual processing finally begins. I use Bonding BOSS to eliminate the musty smell. A primer that can be used as both a barrier and adhesion primer. Here I kill two birds with one stone. I eliminate the musty smell and prepare the smooth front for the paint.


Because of the smell, I apply 2 coats all around the dresser, inside, outside, top and bottom, to make sure to lock in all the musty smell. After that I let the whole thing dry well.
Next I attach a trim from Woodubend, the TR712. To do this, I first heat it up. I use a hot air dryer, but you can just as easily use a normal hairdryer.
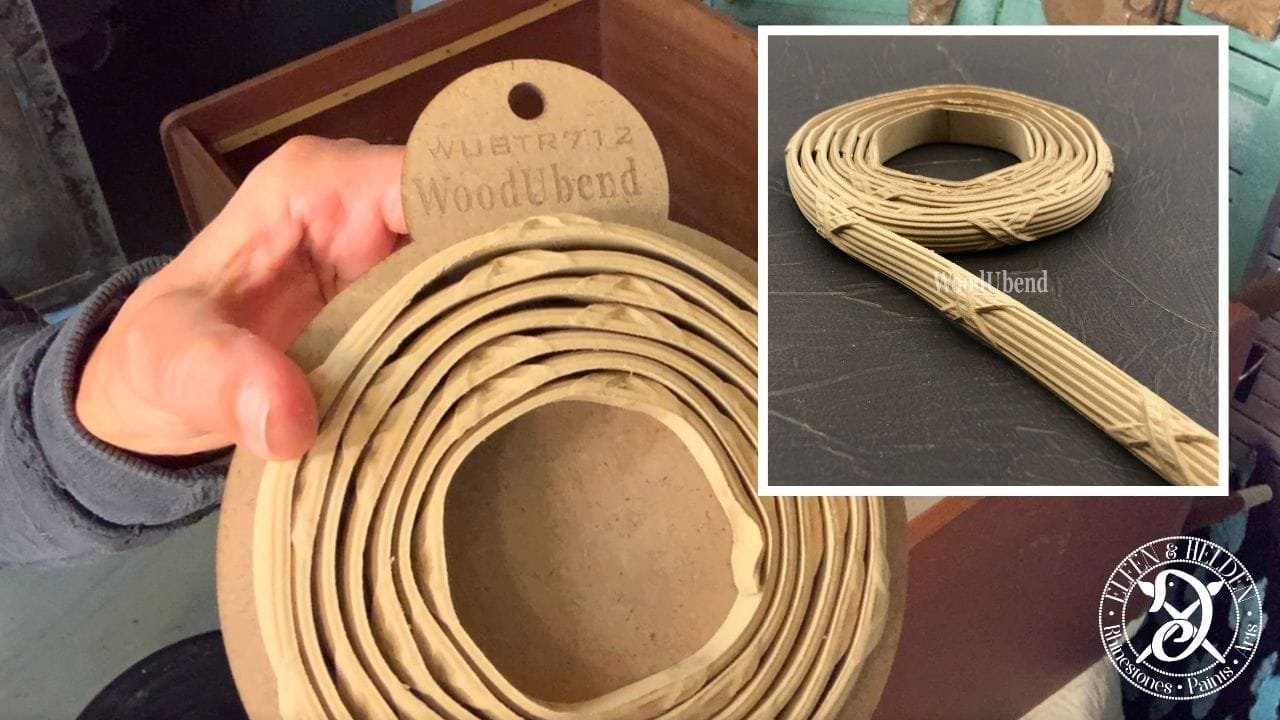
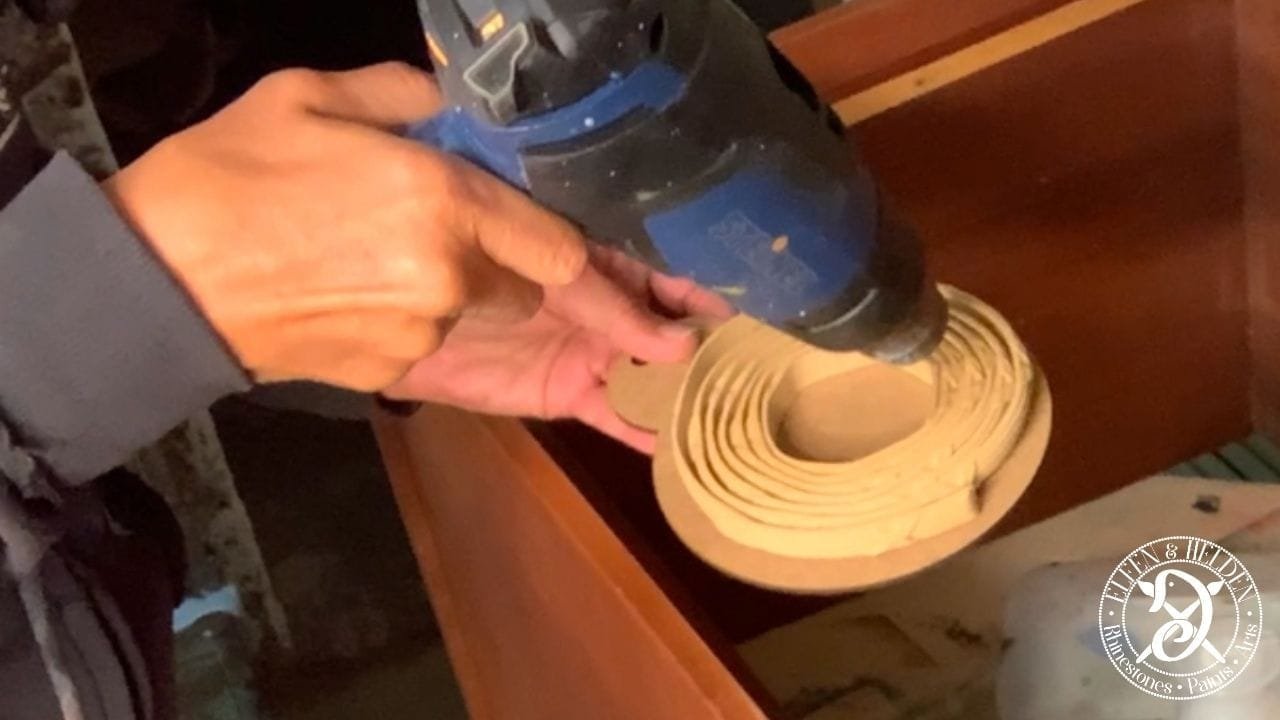
When heated, the Woodubends become flexible, so I can now easily unroll and cut the strip to size.
Since this trim has a symmetrical pattern and I want it to be centered, I actually measure the center. The trim is placed in the center with one of its pattern crosses.


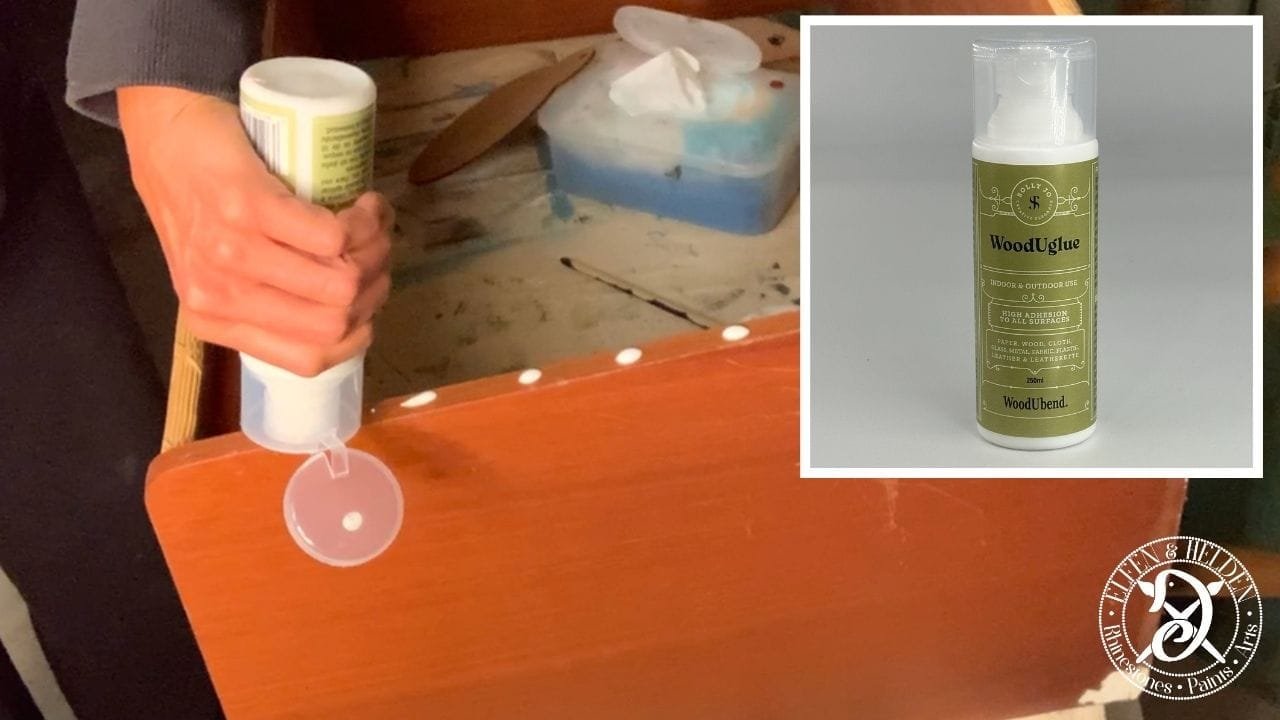
The WoodUbends are attached using wood glue. I use WoodUglue from WoodUbend and apply it with a brush to the relevant areas of the chest of drawers. This glue should be “activated” briefly with a hairdryer to make it sticky.


Then I put the trim on and press it firmly. To make sure that it really has complete contact with the surface, I heat it up again and press it down again, especially at the edges.
If you ask me now whether I always paint my projects at the bottom, then my answer is: No! However, since I worked with Bonding BOSS all around here due to the smell and the feet are painted anyway, it makes it easier in this case.

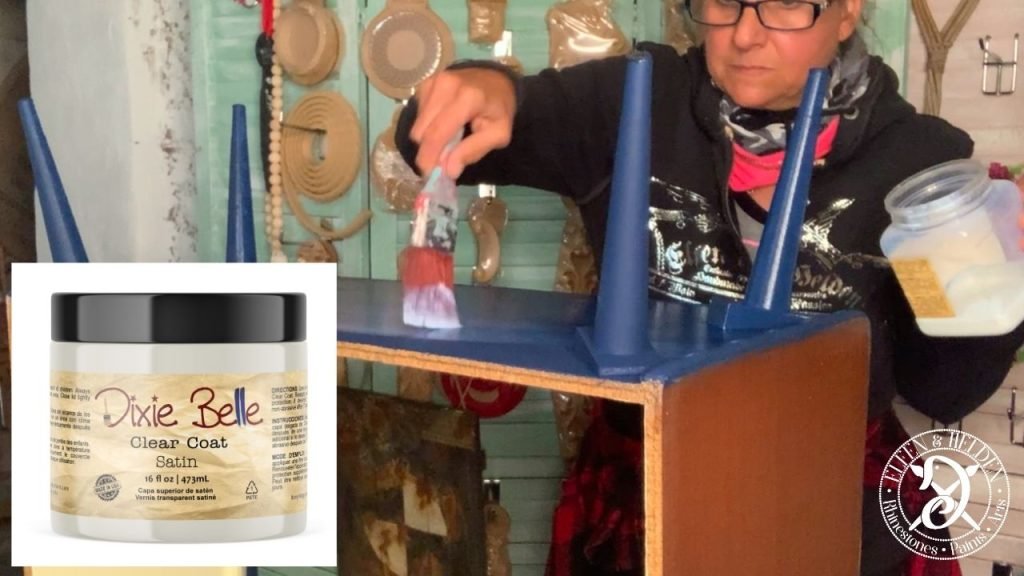
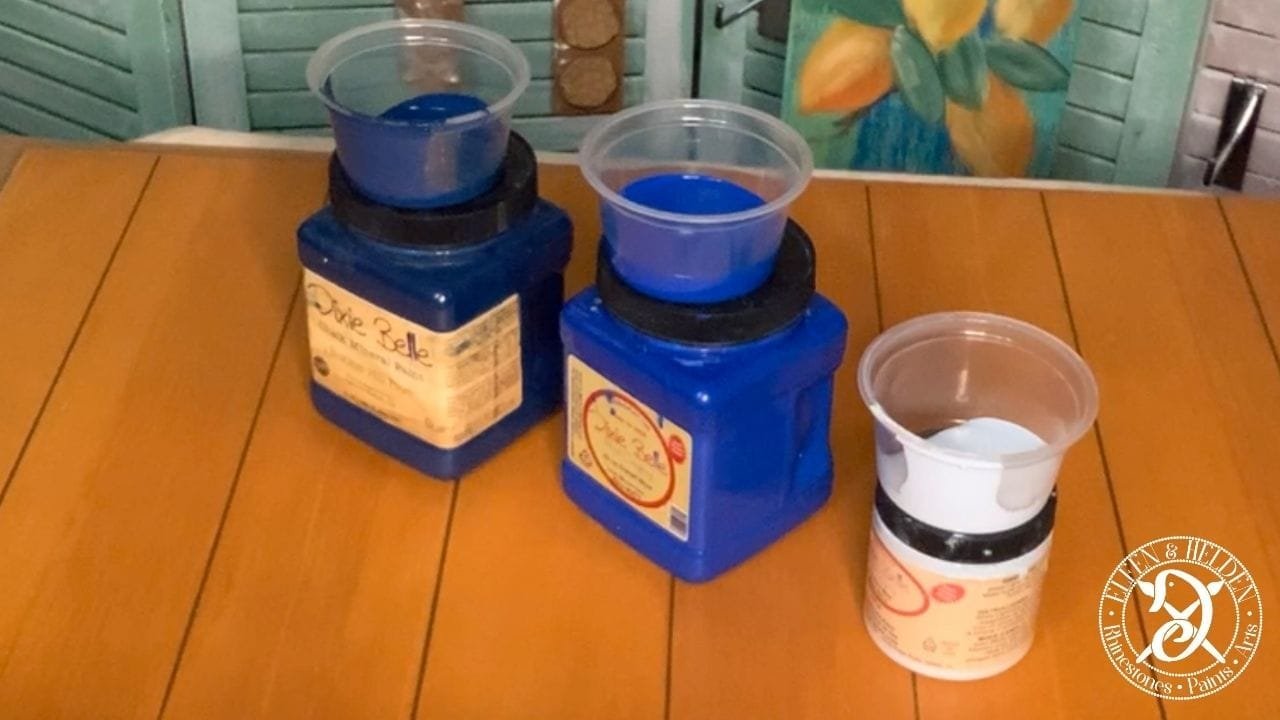
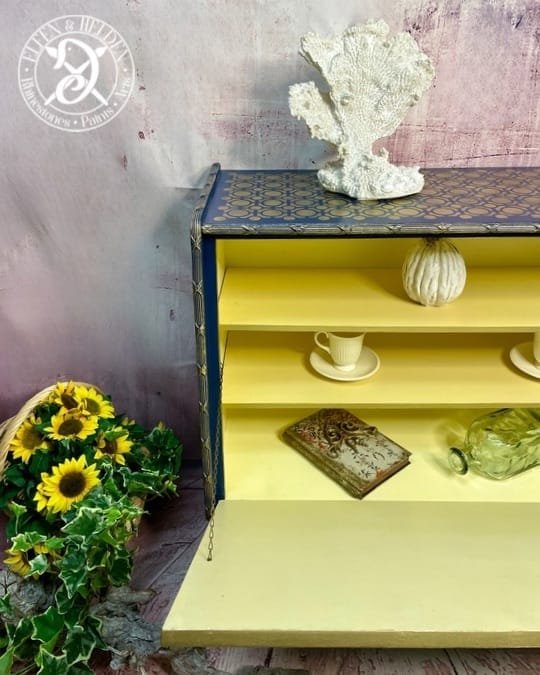
The bottom, top and side panels are painted 2x in Bunkerhill Blue.
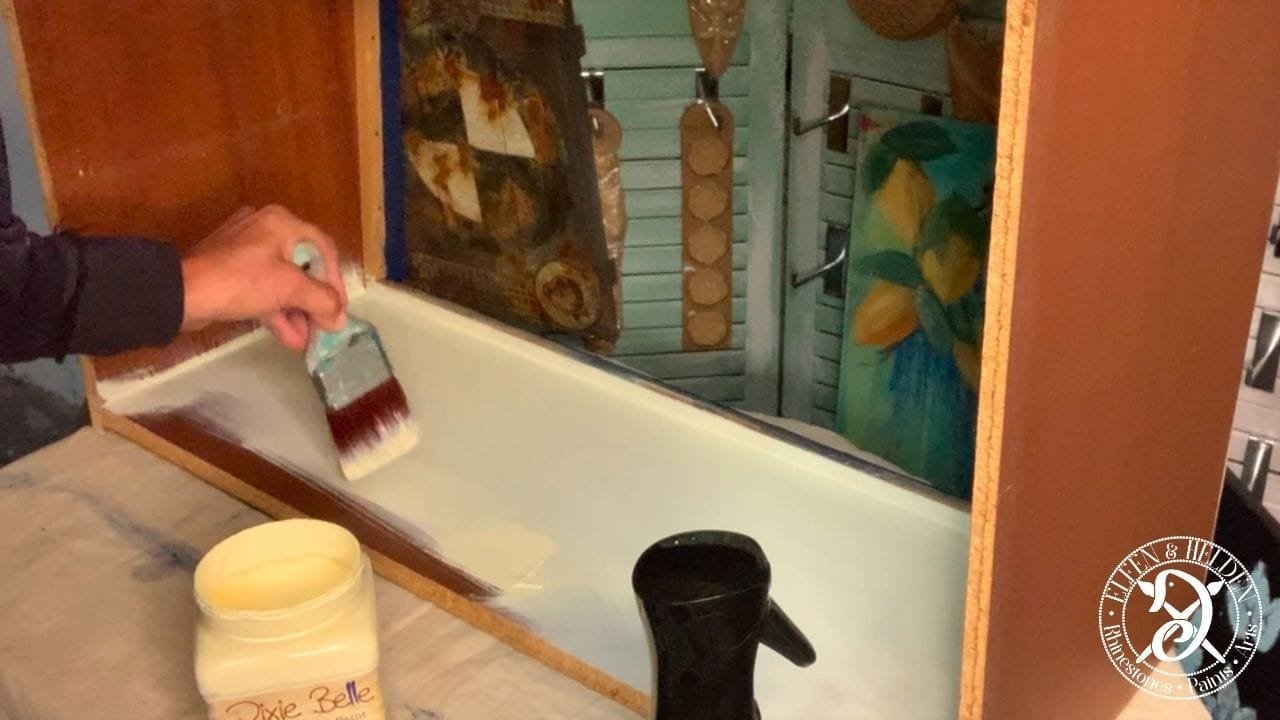
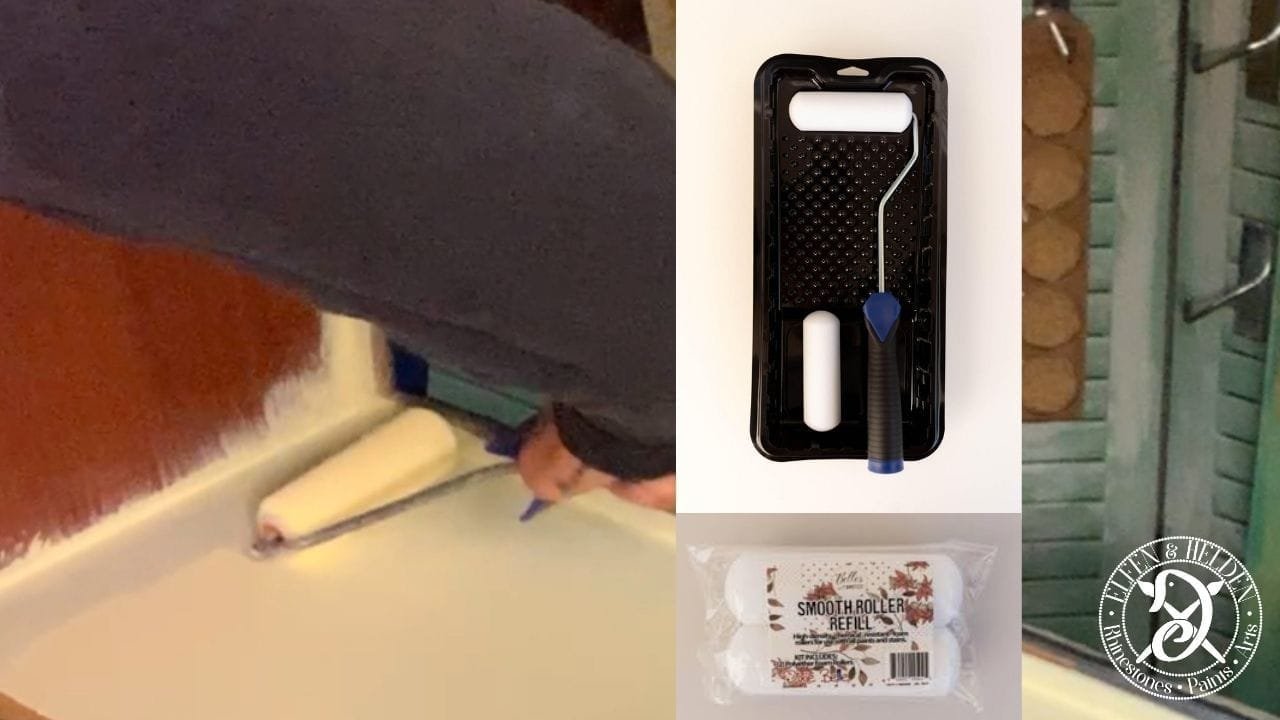
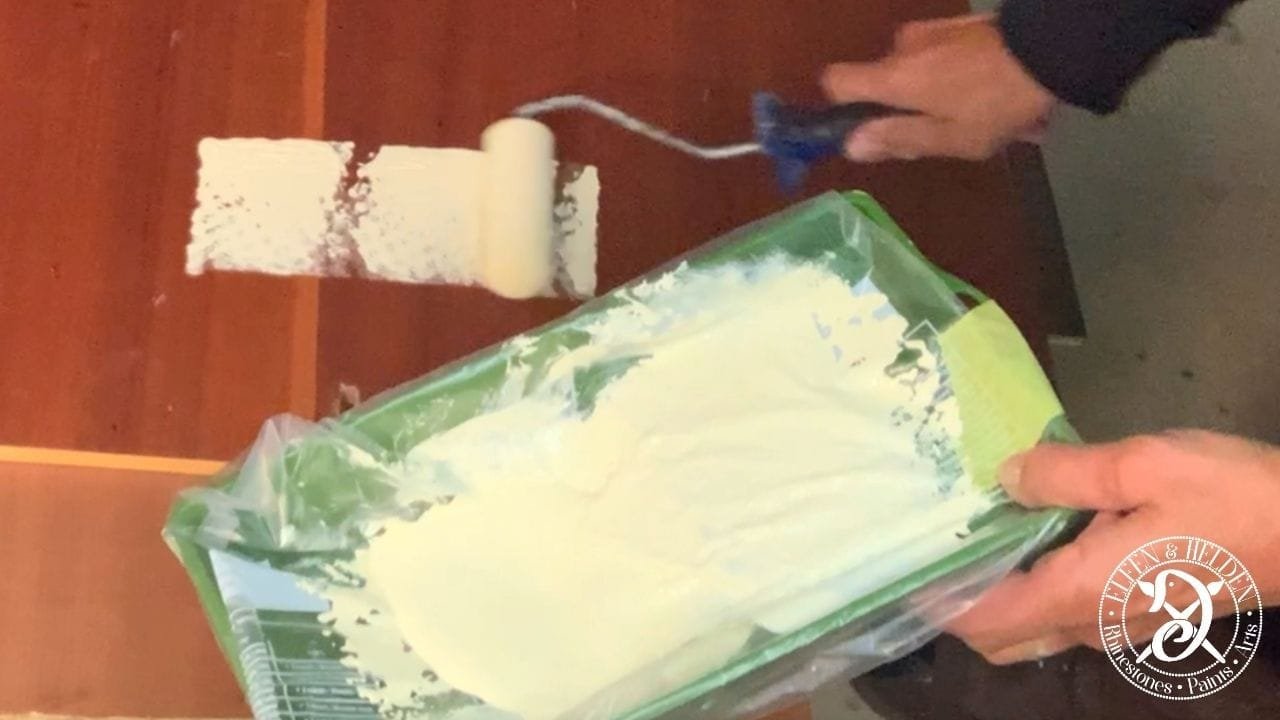
As you can see, it’s upside down here, which also makes some work easier. So I’ll start right at the top. The inside of the chest of drawers is given 2 coats of Dixiebelle Lemonade, a delicate sunny yellow. The paint can be applied with a brush or paint roller. As there are a lot of straight surfaces here, I switched to the roller, which is a bit quicker in the end.

At the end, the shelves shine in slight contrast to the Lemonade in Rebel Yellow. Here, too, I paint 2 coats.

Before I keep turning the chest of drawers back and forth, I’m going to finish the underside first. I also seal the underside and feet with Dixiebelle’s Top Coat Satin for a beautiful satin finish.
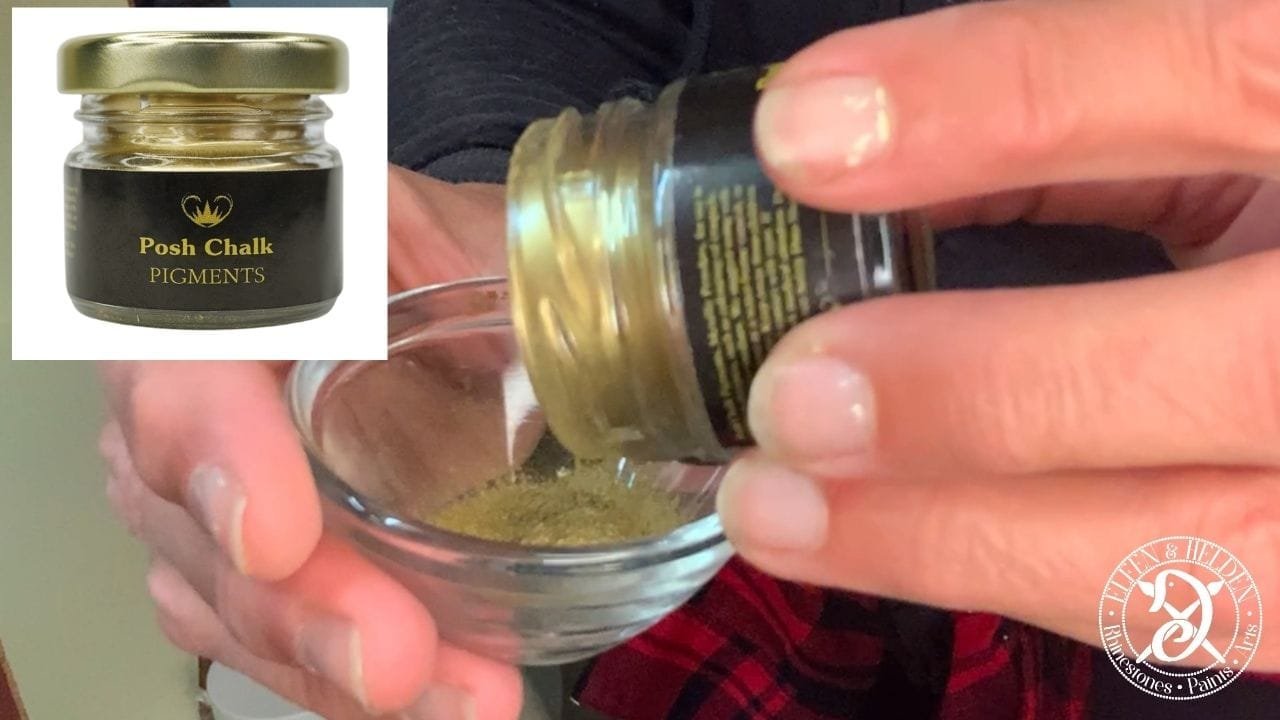
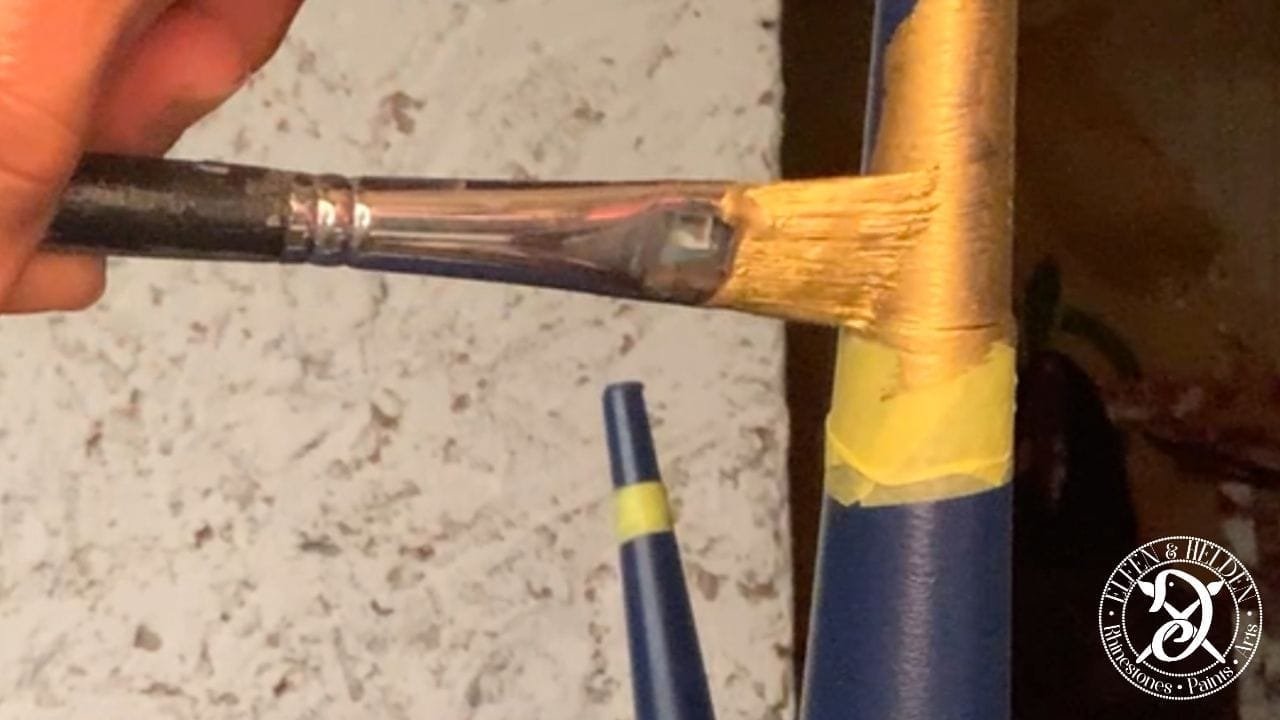
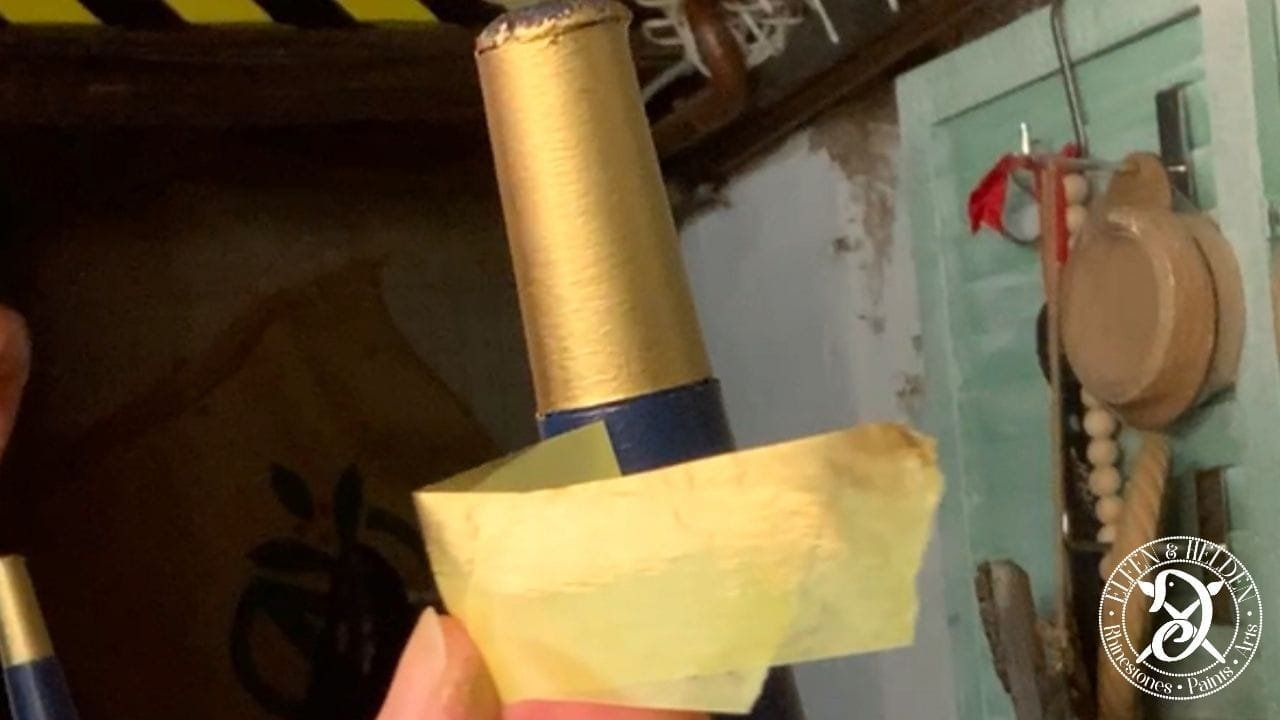
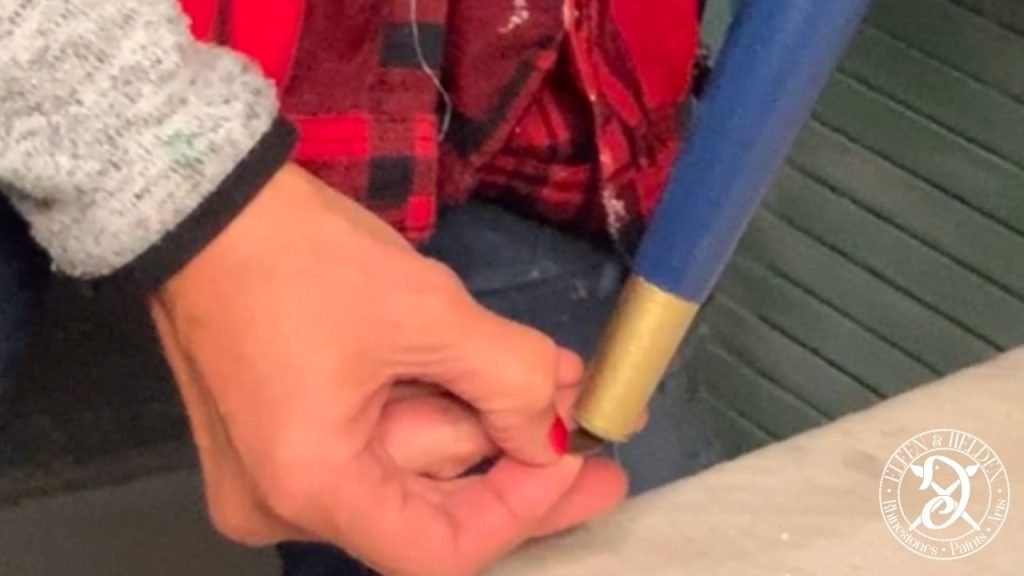
The feet, which by the way are made of plastic, now have gold tips. I use the Byzantine Gold pigments from Posh Chalk and mix them with the Posh Chalk Pigment Infusor by feel. Depending on the desired opacity, you can use more or less pigment.
For a clear edge, I taped the feet accordingly.


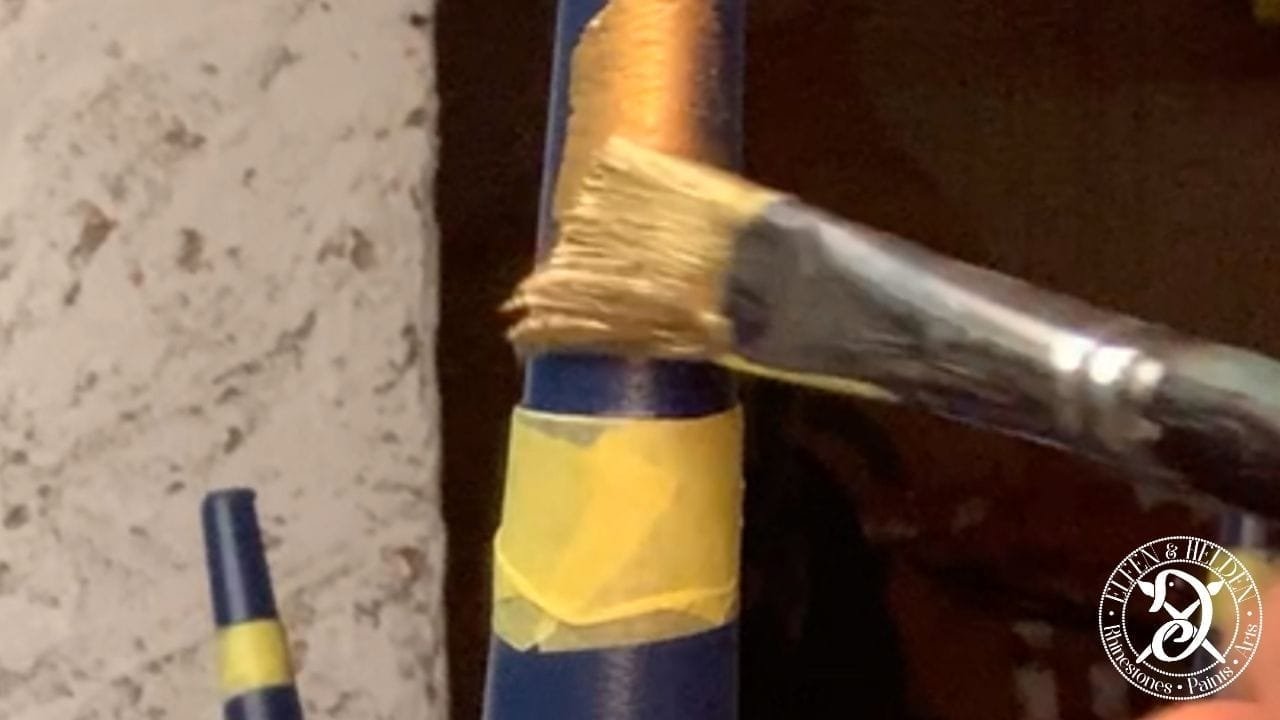
Let’s move on. I check again whether I have applied the gold opaque everywhere. To avoid the paint running under the tape, you should paint with the direction of the tape, use a good tape* and don’t use too much paint. If you don’t want to take any risks at all, you can seal the edges of the tape with a clear topcoat beforehand.
Now the interior is sealed, also with the top coat satin.


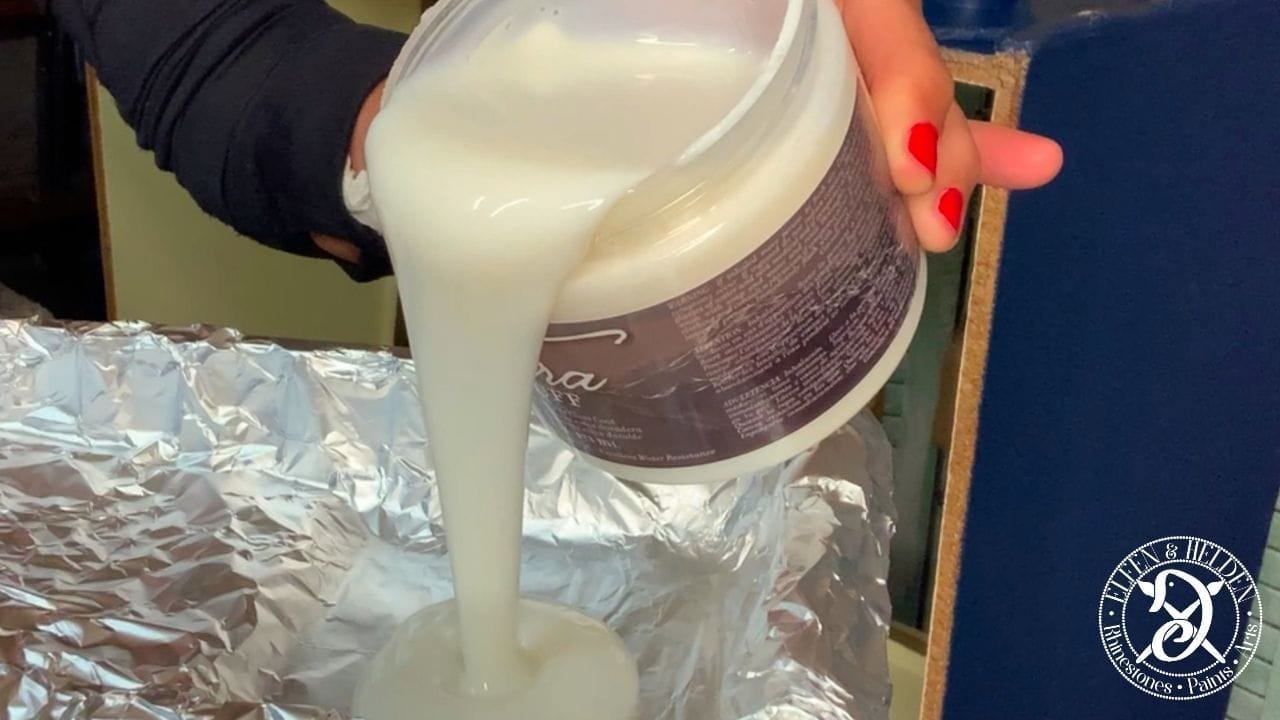
I use Terra Tuff for the shelves because it is more protective and harder than the normal top coats.


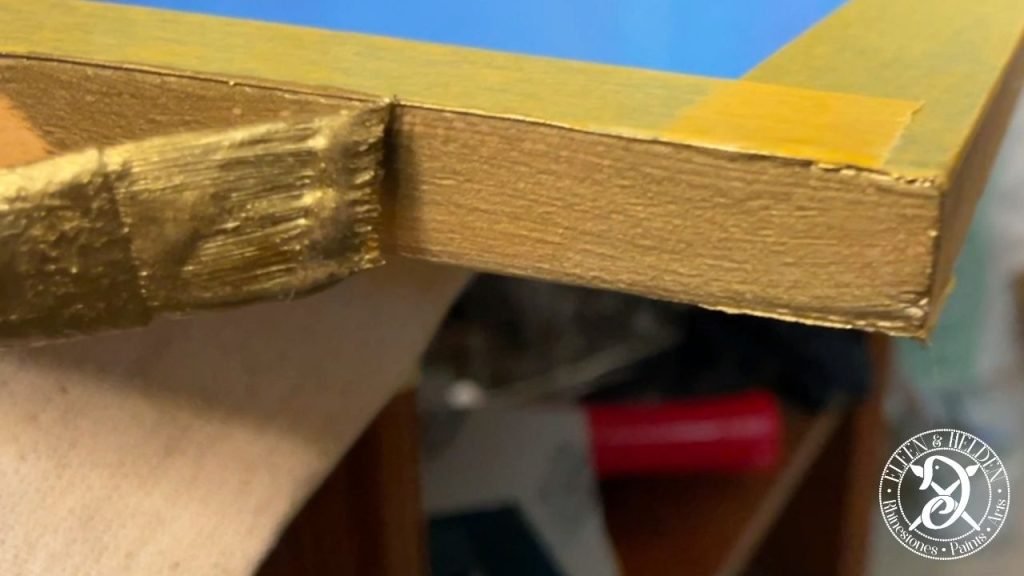
All edges become golden.
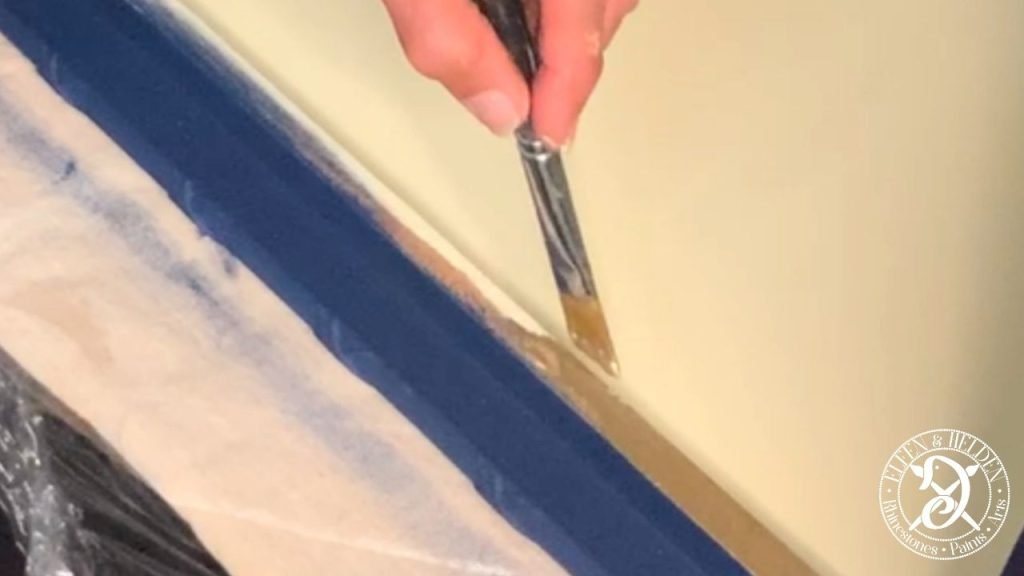
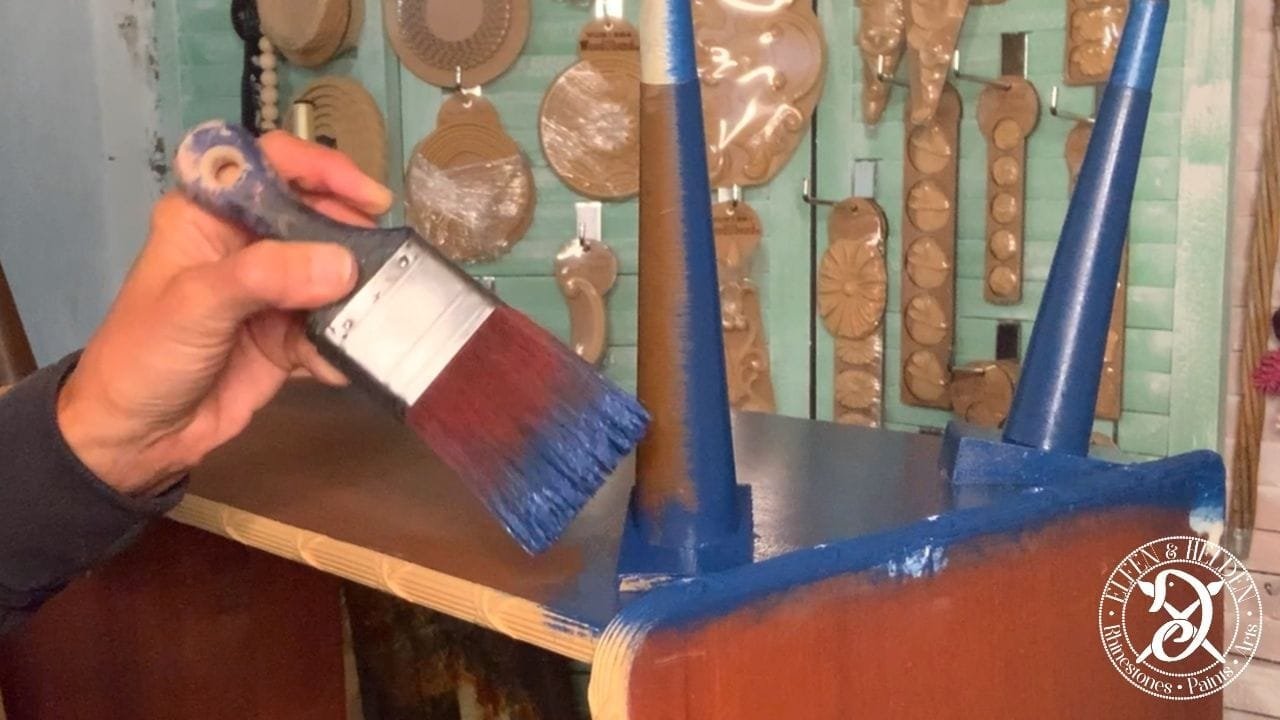
Now it’s finally time for the outside. As mentioned at the very beginning, the sides and top are first painted with 2 coats of Bunkerhill Blue.
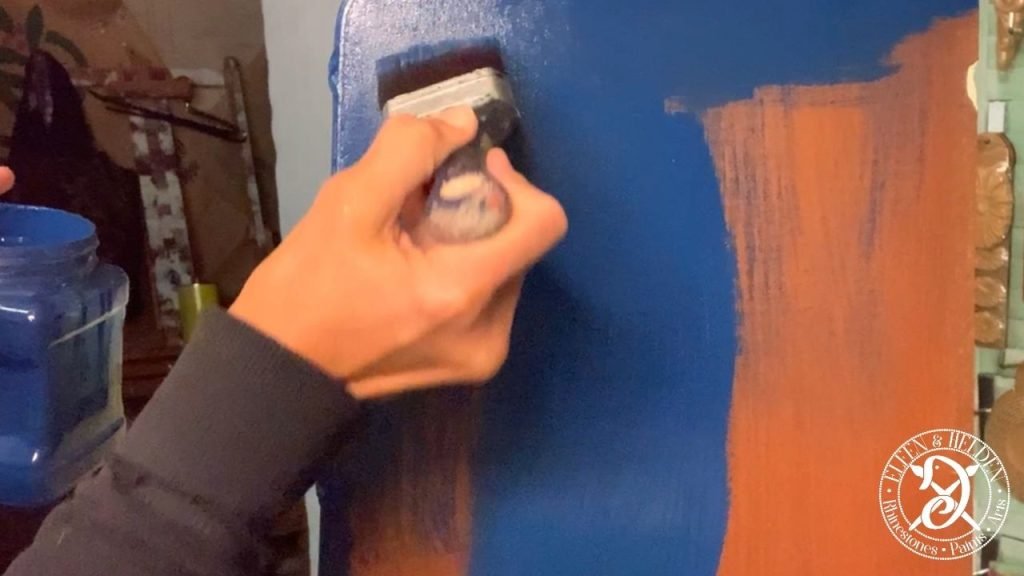
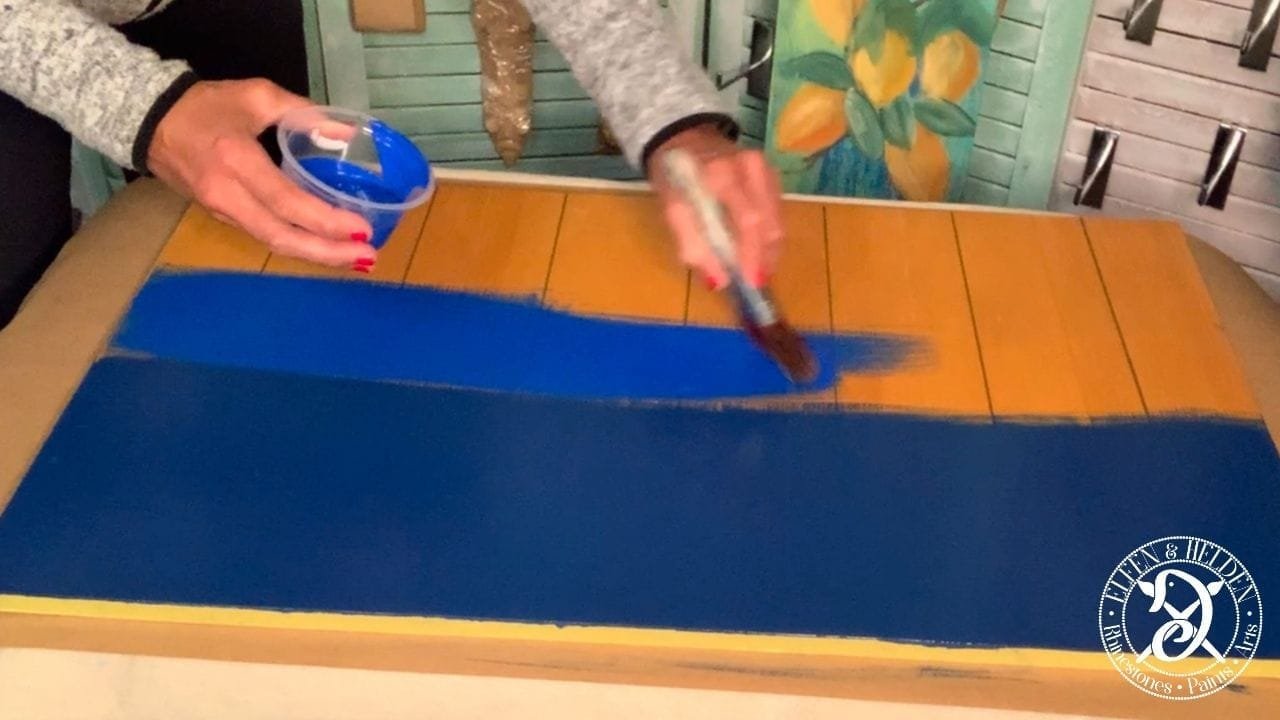
The front flap gets a color gradient from Bunkerhill Blue via Cobalt Blue into Haint Blue. I always have my Fine-Mist Bottle to hand to keep the color smooth for blending. There are many techniques for color gradients, this is just one of them. Bunkerhill Blue and Cobalt Blue are close to each other in terms of color, so this color gradient is very easy to create. The Haint Blue, on the other hand, is very light, which means that the color gradient is a little more difficult.


I first apply the paint in blocks and then go over the interface of the colors with my brush. I make sure that both the paint on the project and my brush remain moist at all times. Long, even brushstrokes, barely touching the surface. If the interface starts to blur, I still draw the color into the next color with even brush strokes. I work with both colors. From light to dark and vice versa, until I am satisfied with the result.
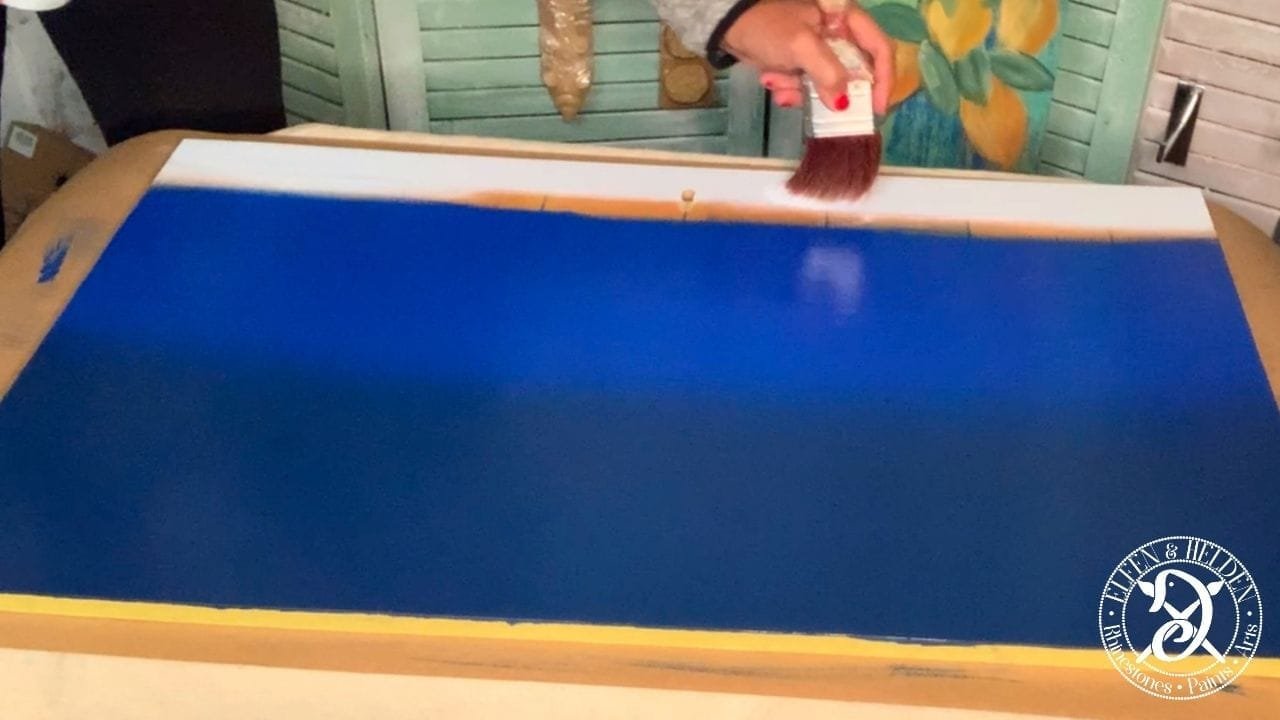
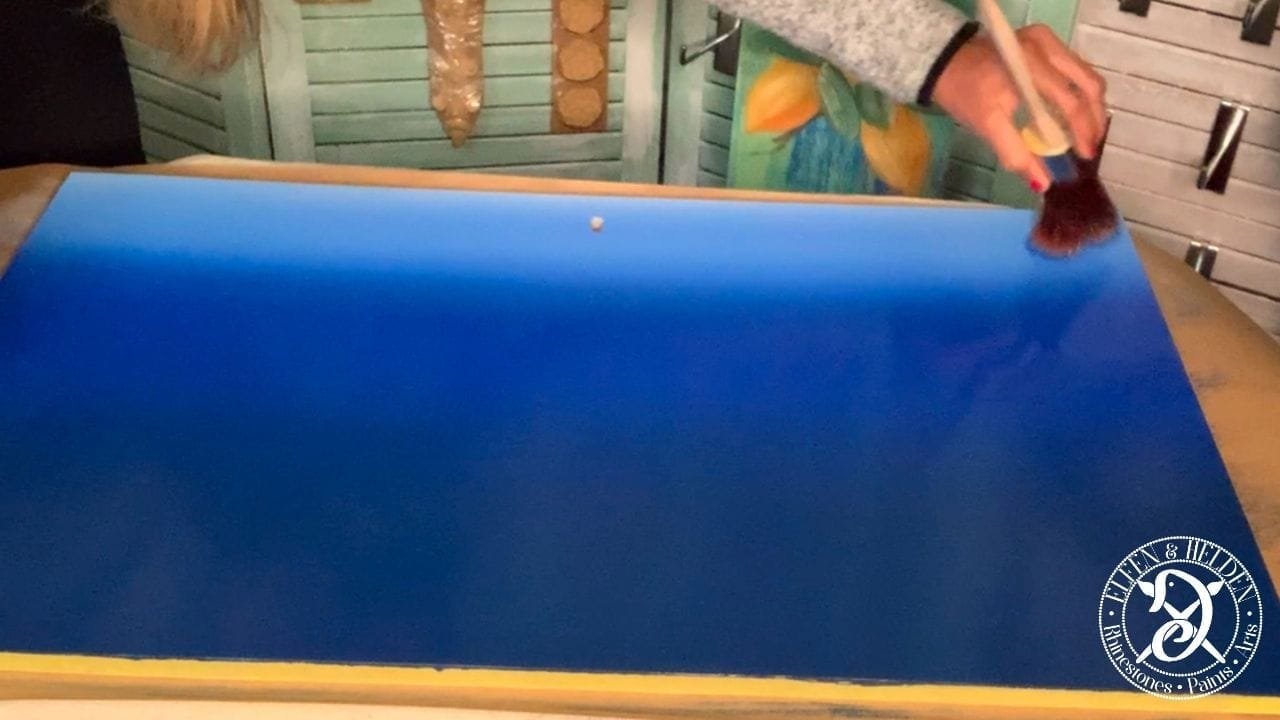
The first layer is not yet about perfection. I look here to see how far I want to take the individual colors. If I’m not satisfied, I can easily correct it in the second job.
I work the second layer using the same technique, except that I end up using a dry brush without any paint at all to soften the transitions even more. Here, too, I hardly touch the surface. I call it butterfly kisses. If this “neutral brush” has absorbed too much of the paint, I clean it with a cloth from time to time.

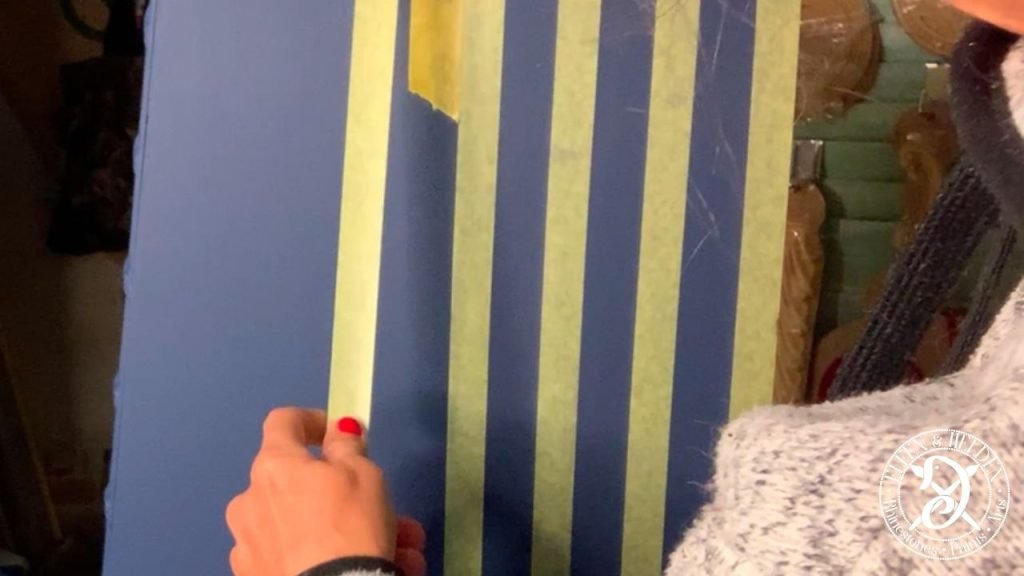
I decided to use my pin stripes on the sides. First I start with the masking. Instead of measuring the strips, I also use a piece of adhesive tape to ensure the correct spacing. Whereby I choose this spacer a little wider. We’ll get to why in a moment.
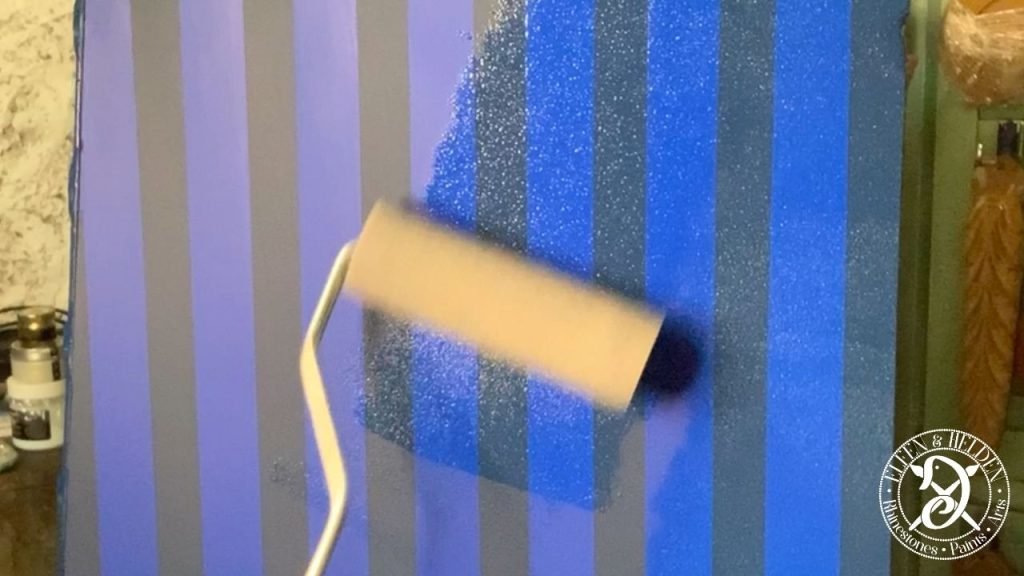
For the strips I now use the Cobalt Blue and apply it lengthwise.

After the 2nd application, I first remove the tape. I love this moment, so satisfying. Perfect edges, yesssss.

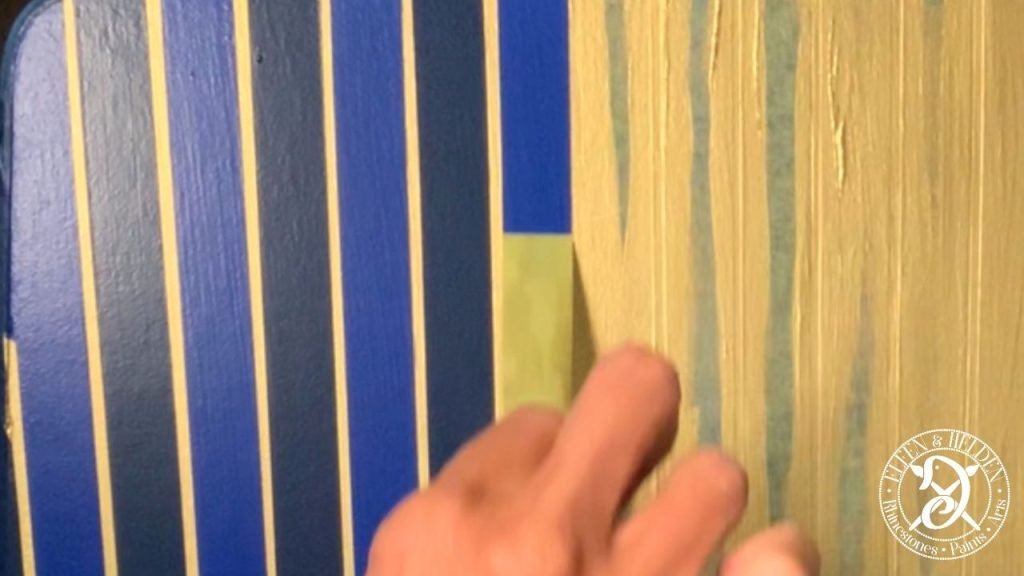
After the paint has dried, the strips are sealed before I get to the actual pin stripes.
Now they are gluing like world champions. First I mask off the Bunkerhill Blue again. Then I placed the strips in the middle so that the distance to the right and left is about the same. Now you can see why I used a slightly wider adhesive tape as a spacer earlier.


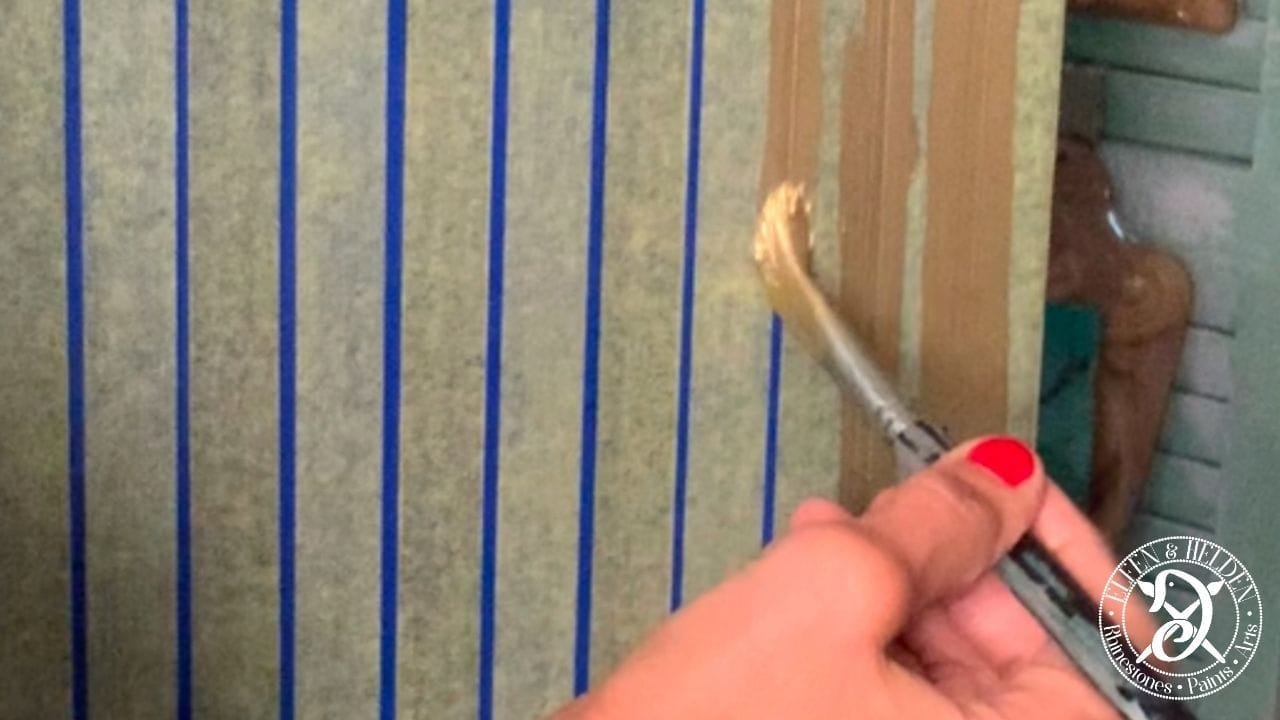
For the pin stripes I mix Byzantine Gold pigments with the Posh Chalk Infuser again.
Et voila! As the infuser is also a sealer, the side is now finished. What do you say? Do you like it?
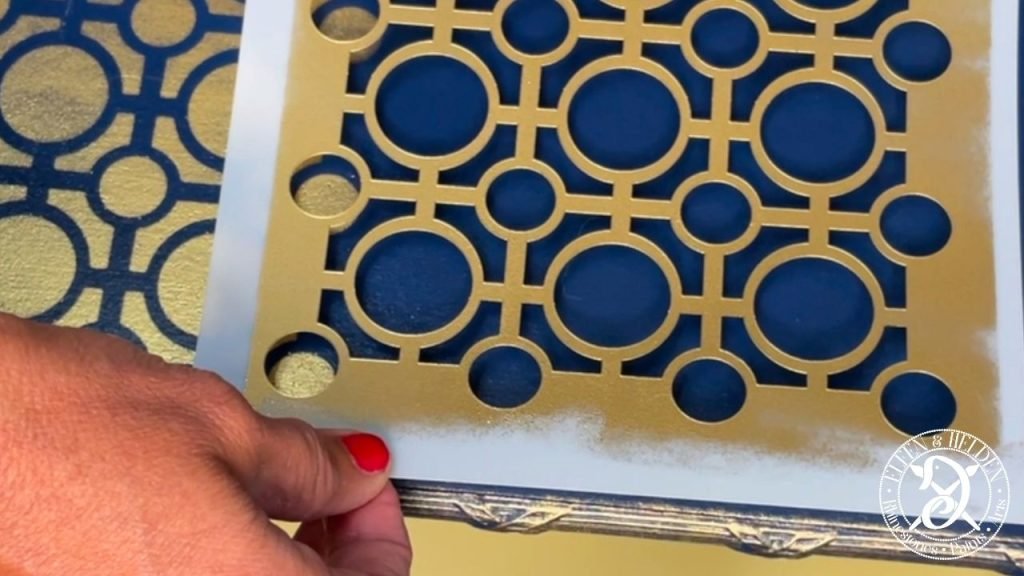
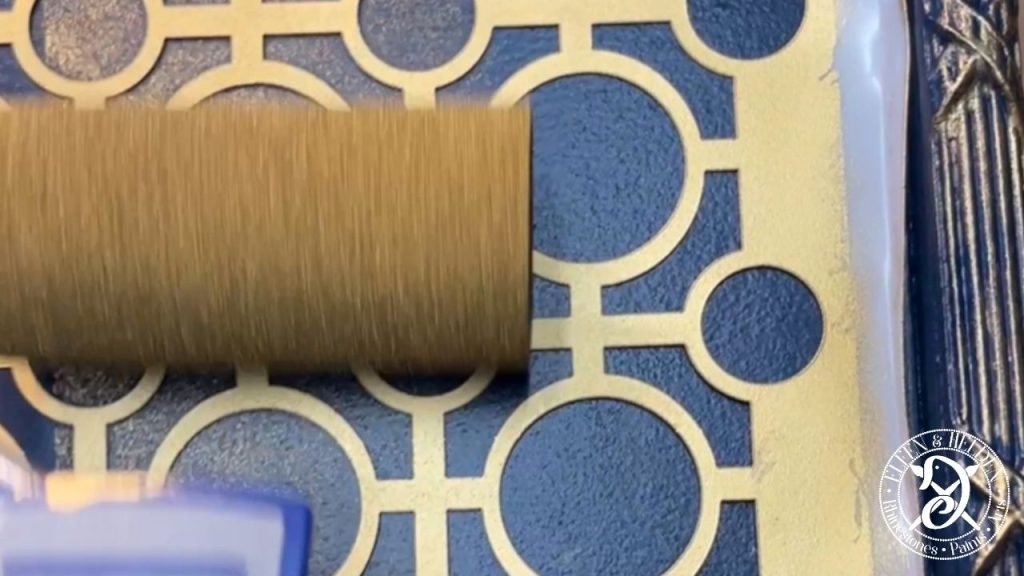
And I have to mix the gold again because there’s a cool retro stencil on top, namely the Posh Chalk Stained Glass Small stencil. For large areas, I admit to being too lazy and use the paint roller for stenciling. Here, too, I work with little paint to avoid bleeding under the stencil.

So, here is the last golden edge.
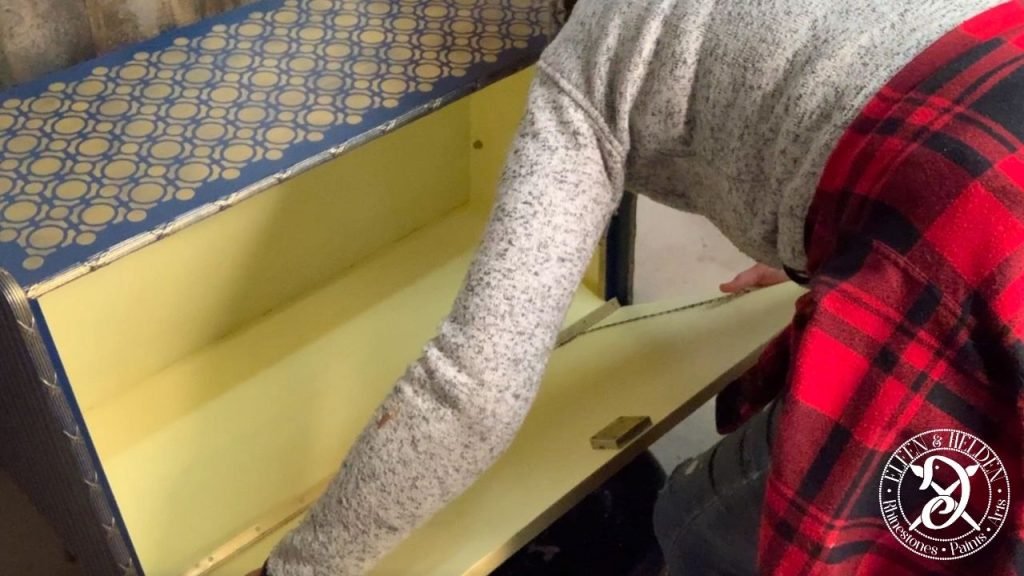
Then everything can be put back together again. I have already nailed the back panel back in and repaired the holes for the hinge strip so that the screws have grip again.
At the very end, the good piece gets a set of felt glides.
Our little piece of jewelry is ready in a flash. What do you think? Cool, right? (You will find more pictures below ?)

Do you have any questions or suggestions? Then feel free to write me in the comments or write me a message.
For today I say thank you again for reading and goodbye until the next blog post
Your Master of Disaster
Angela
Products used:
Dixiebelle Bonding Boss Clear/Transparent
Dixiebelle Chalk Mineral Paint
Dixiebelle Top Coat
Posh Chalk Pigments Byzantine Gold
Posh Chalk stencil Staines Glass Small
Dixiebelle Fine Mist Bottle / Spray Bottle
Not all of my favorite products I carry myself in the shop. Nevertheless, I do not want to withhold them from you and am happy about every cent in my coffee till, so that I can continue to compile informative contributions for you.
The links marked with an asterisk (*) are so-called affiliate links. If you click on such an affiliate link and buy via this link, I get a commission from the online shop or provider in question. But your price does not change!
Festool Geared Random Orbital Sander ROTEX RO 90 DX FEQ-Plus
Festool 497481 Interface Pad IP-STF-D90/6
Festool CTL SYS Mobile Dust Extractor – 575279
Hot air gun Steinel HL 1920 E*
Into the Blue


Sign up for my newsletter and stay up to date.
I share new products, creative trends, helpful tutorials and exclusive offers with you.
You can easily unsubscribe at any time – via the link in the footer of every email or by sending me a message. You can find the relevant contact details in the imprint or directly in the newsletter.